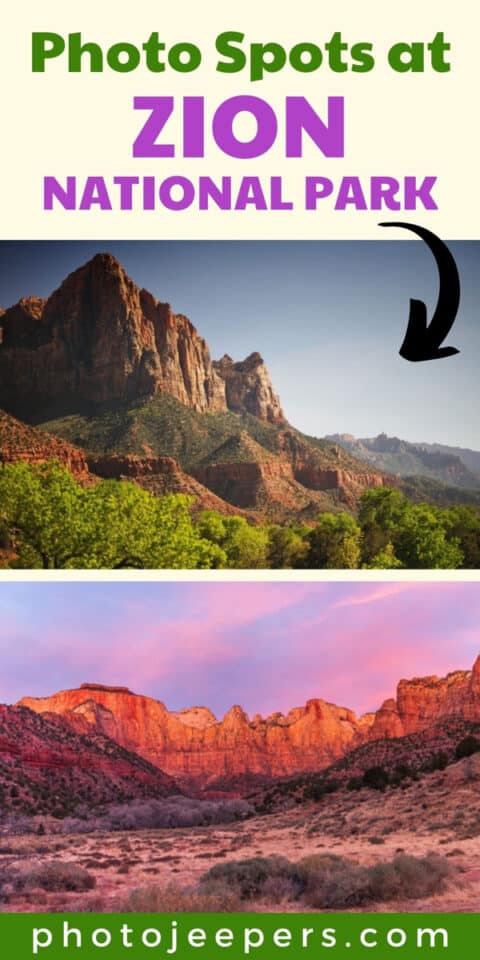
Zion National Park Photo Spots
Located in southwest Utah, you’ll find popular Zion National Park photo spots to capture the majestic red sandstone cliffs, canyons, and breathtaking vistas. It is a photographer’s paradise.
This Zion National Park travel guide includes a list of photo opportunities for both amateur and professional photographers alike.
One advantage to living only a few hours away is that we can photograph Zion National Park during the various seasons, months of the year and during all types of weather and lighting conditions.
Below we share our favorite photo spots at Zion, tips for taking pictures at Zion, and the camera gear you’ll need.
This site contains affiliate links which means WE may receive commissions for purchases made through these links. We only provide links to products we actually use and/or wholeheartedly recommend! As an Amazon Associate, we earn from qualifying purchases. Read the full Disclosure Policy.
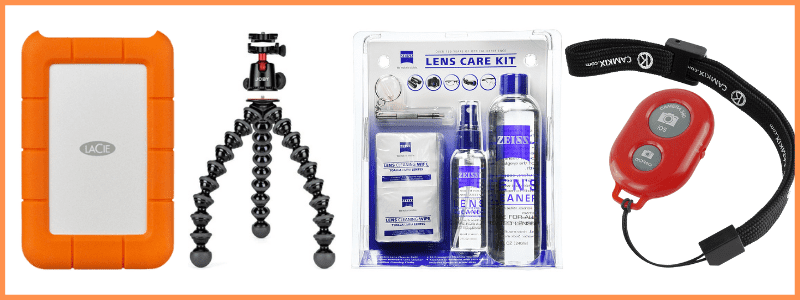
Camera Gear for Landscape Photography
- Tripod: take a look at these compact and lightweight travel tripods!
- Camera Bag: protect your camera from sand and water → We use Lowepro camera backpacks for outdoor photography.
- Neutral density filter: to compensate for variance of light you’ll need to use a neutral density filter. → Check out the Kase magnetic filters we use!
- Camera cleaning kit: remove dust or water that WILL get on your lens. NOTE: this is not for cleaning the sensor.
- Memory cards: purchase name brand memory cards since you’re trusting your images to the card! → We use Lexar and Sandisk!
- External hard drive: copy photos to a portable external hard drive ‘just in case’.
- Headlamp: use when taking sunrise and sunset photos!
Camera Gear at B&H Photo
Things To Know Before Visiting Zion
Before visiting Zion National Park you’ll need to know if the shuttle running when you’ll be there. If it is then you’ll have limited access to sunrise and sunset photography at the locations in Zion Canyon.
If your Zion vacation is in the spring, summer or fall when the Zion National Park shuttle is running, don’t worry. You can still get nice morning or late afternoon photos at the locations in the canyon.
To help you plan, we’ve indicated the “location” for each photo spot below. If it’s in Zion Canyon, then it’s only accessible using the shuttle during shuttle season.
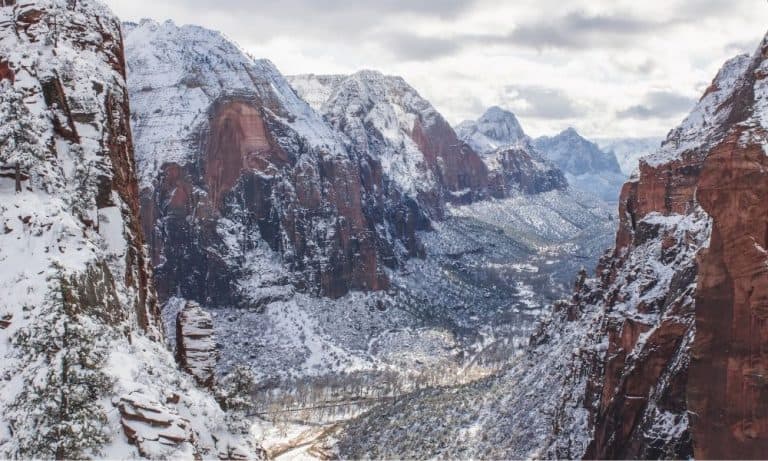
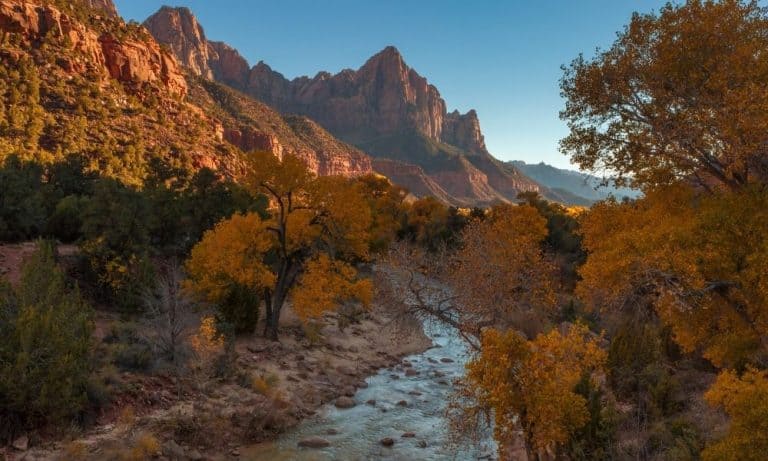
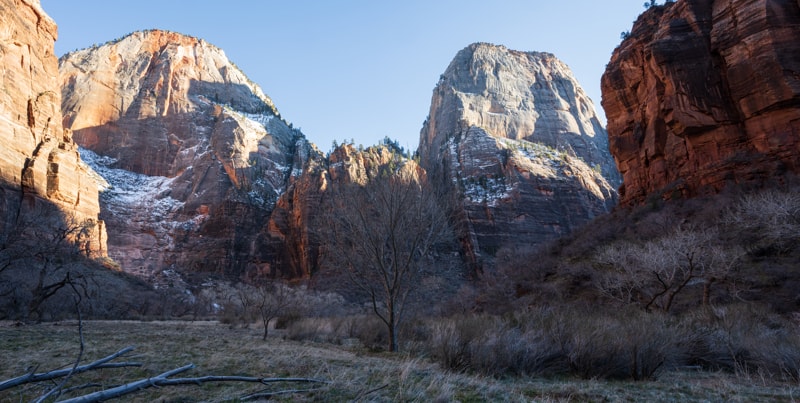
A Photo Tour of Zion National Park
Take a visual tour through Zion National Park to see the stunning landscapes you’ll see when you visit!
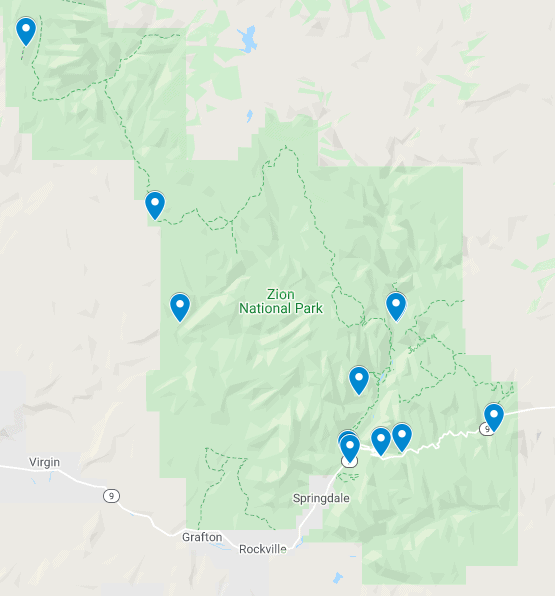
Map of Zion Photo Spots
CLICK the link to access the Zion National Park photos spots Google Map with the pinned locations.
→ CHECK OUT our Zion National Park Photography Guide with detailed information and tips about taking photos at each spot. It’s a great resource to download, print and take with you on your trip!
Zion National Park Photo Spots and Tips
In this article, we’ll explore some of the best photo spots in Zion National Park so that you can get out there with your camera and start capturing those amazing memories!
For each photo spot below, we provide the location, best time to photograph and images. We recommend taking pictures at Zion in the morning and evening and hiking during the harsh midday light.
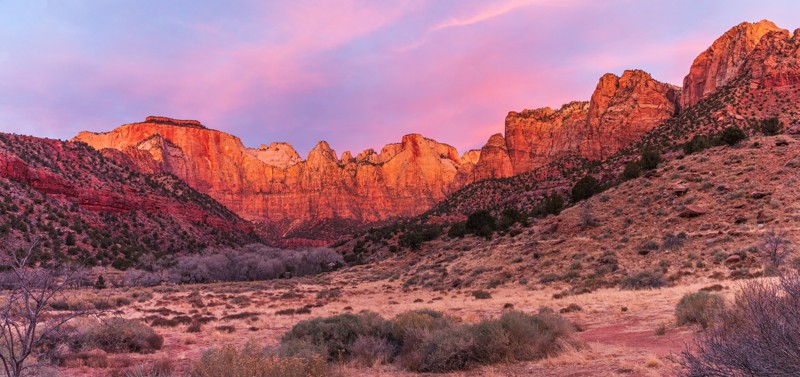
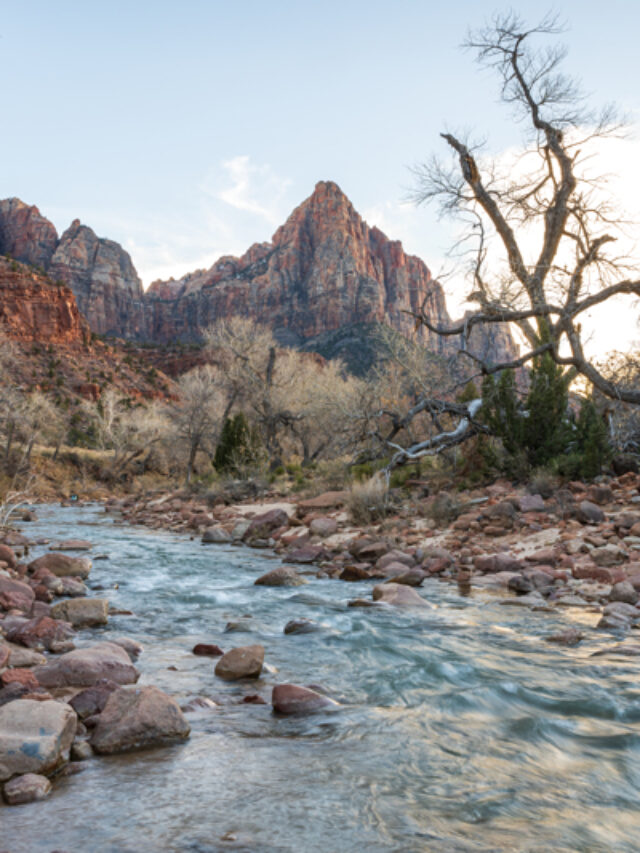
Zion Human History Museum
- Location: Zion Canyon Shuttle Route
- Best Time to Photograph: SUNRISE
Photograph the Towers of the Virgin on the patio behind the Zion Human History Museum. There’s a small patio that’s popular at sunrise.
We like to photograph the blue hour light before sunrise, then capture the golden hour light as it shines on the towers.
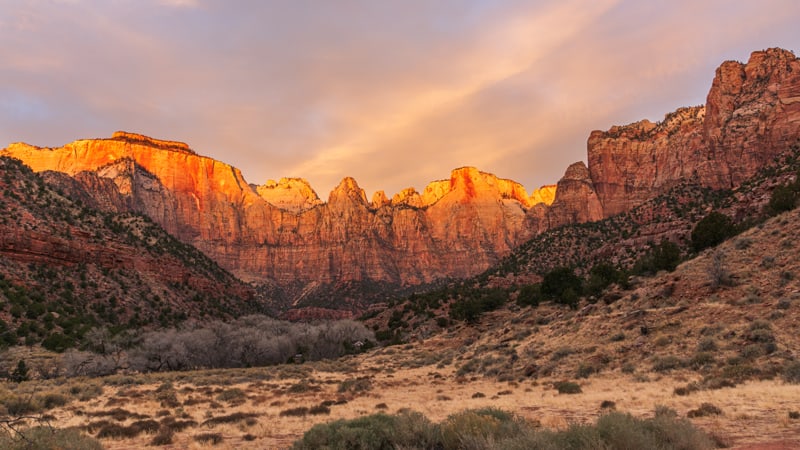
During the nice morning light be sure to photograph the canyon walls seen from the side and front of the museum as well.
Walk around to find different compositions of the scene, and elements to include in the foreground.
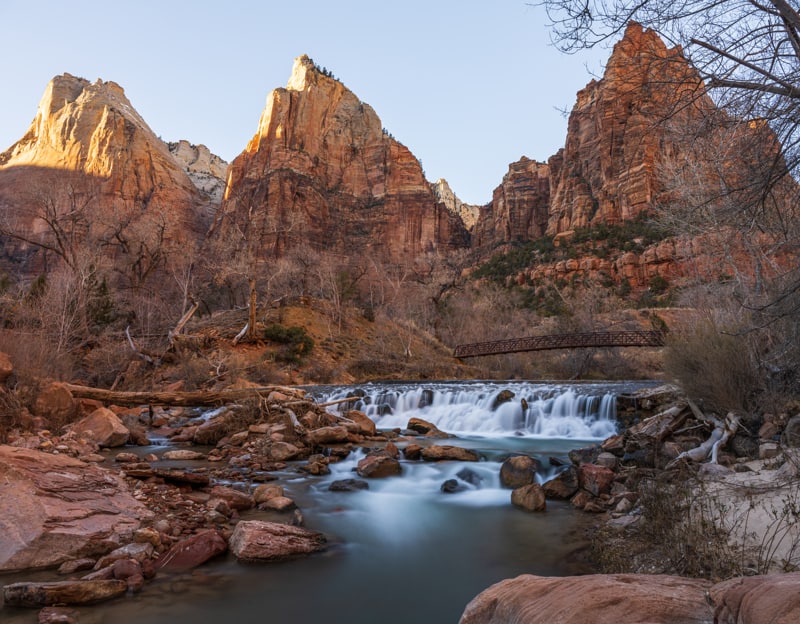
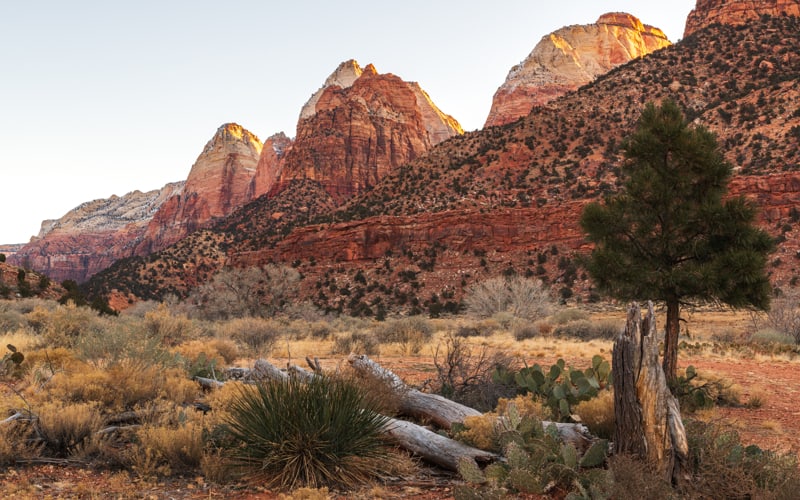
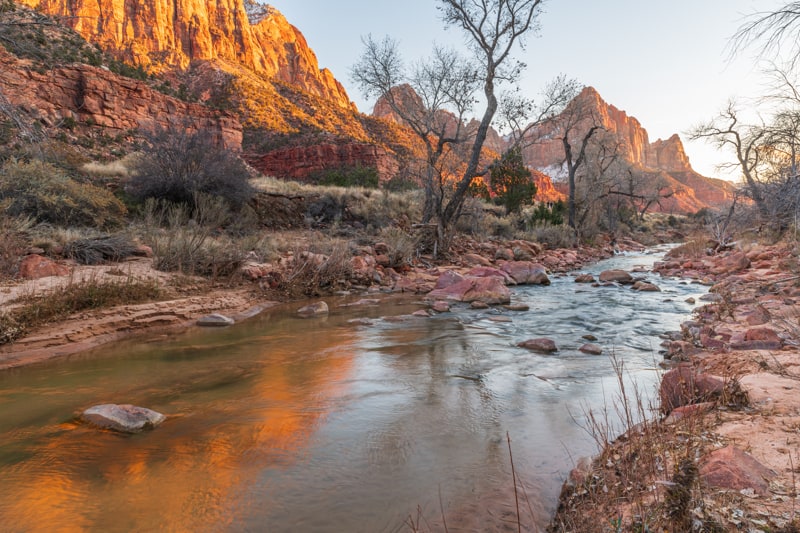
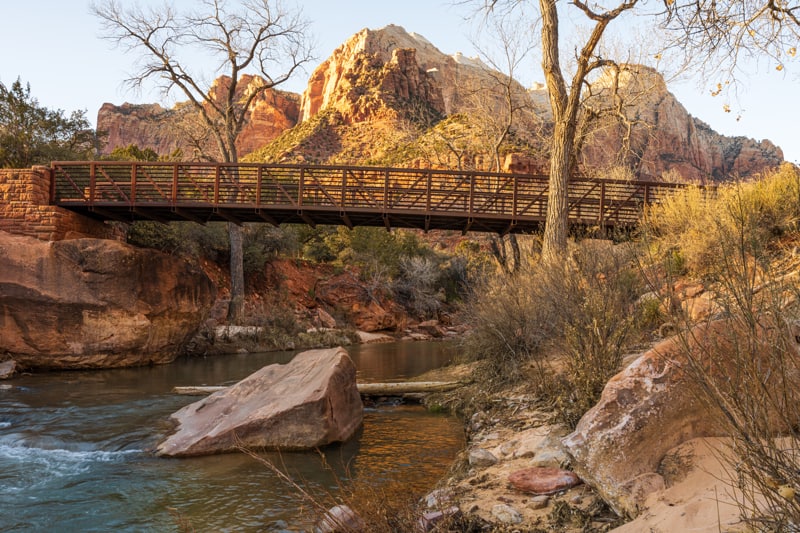
Three Patriarchs
- Location: Zion Canyon Shuttle Route
- Best Time to Photograph: Sunrise, Morning, Late Afternoon, Sunset
The Three Patriarchs area is a terrific location for morning or late afternoon photography. There are quite a few ways to photograph this area so don’t think this will be a quick stop!
It’s ok to walk along the service road toward the buildings where you’ll find a dirt path to the right. Walk along that trail for a short distance until you come to the bridge. This is a great spot to photograph the river, waterfalls, bridge and Three Patriarchs.
This is a great place for waterfall and river photography.
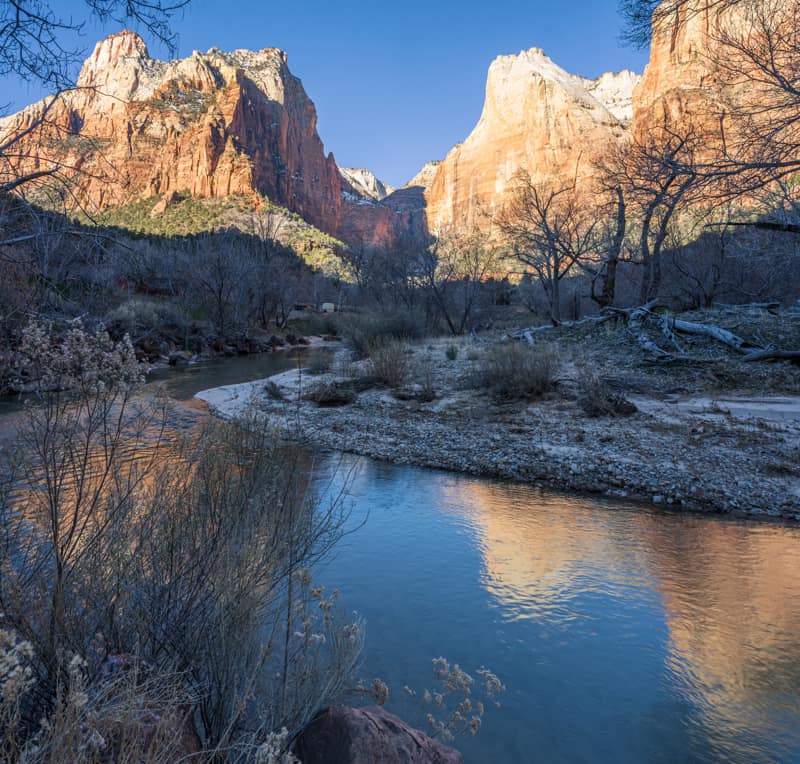
There’s also a path that goes along the river you can access from the shuttle stop. We like to walk along the river to find ways to photograph the reflection of the Three Patriarchs in the river.
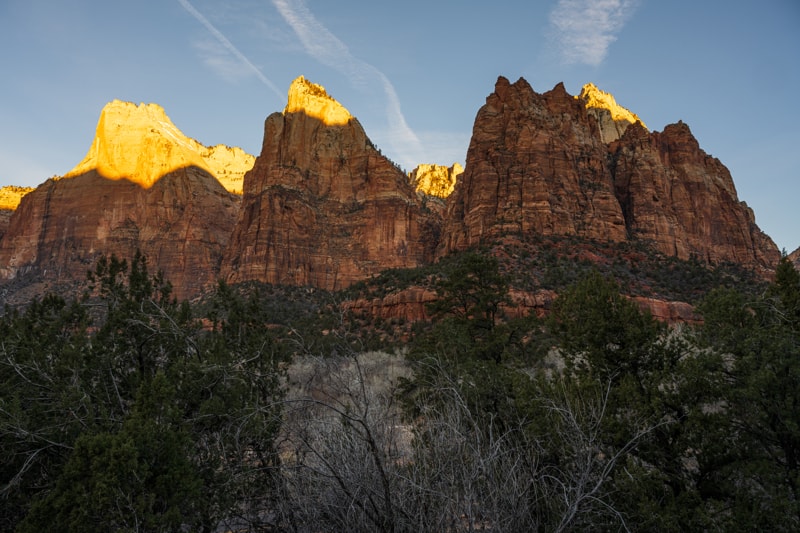
And finally, the view from the short overlook hike on the opposite side of the road from the river provides a different vantage point as well. In the fall, the tops of the trees with colorful leaves adds a nice foreground element.
There are countless ways to take pictures of this area using a variety of basic photography techniques.
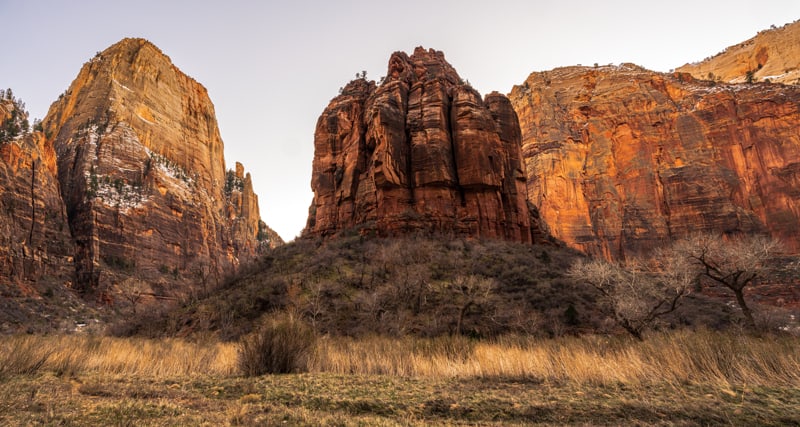
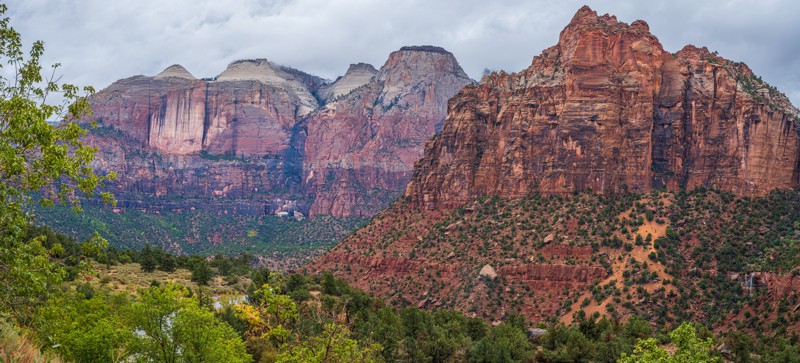
Big Bend and Great White Throne
- Location: Zion Canyon Shuttle Route
- Best Time to Photograph: Morning and Late Afternoon
Big Bend is a great location to walk along the river and photograph the colorful canyon walls you see here! There can be a drastic contrast of light on the walls here. We like this area at dawn or dusk.
There’s a pullout just before (if going up Zion Canyon) or just after (if going down Zion Canyon) Big Bend that provides a good view of the Great White Throne.
If you have time, hike down the path to the meadow and walk along the river to find different ways to photograph canyon walls and river.
In the late afternoon the light illuminates the top of the Great White Throne. You can catch the reflecting color in the river.
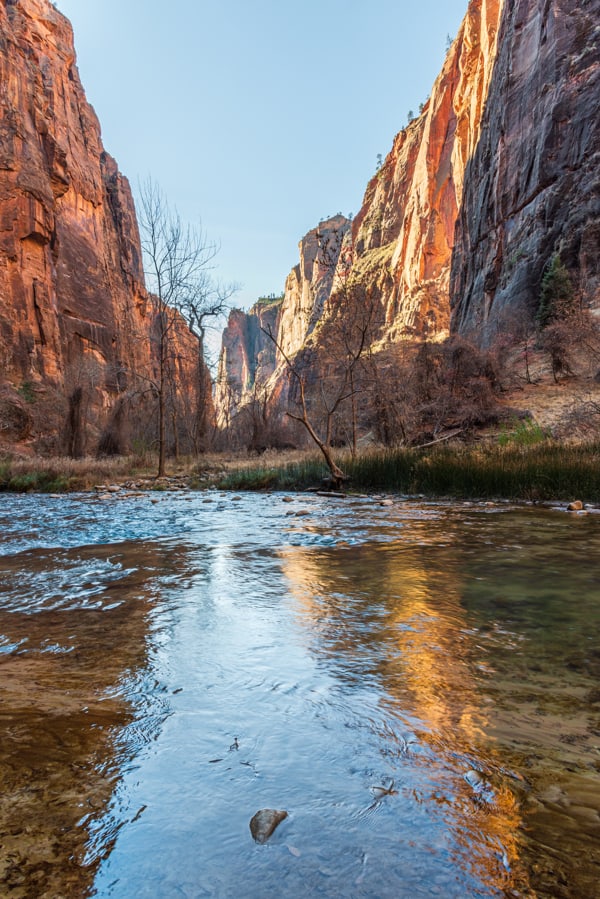
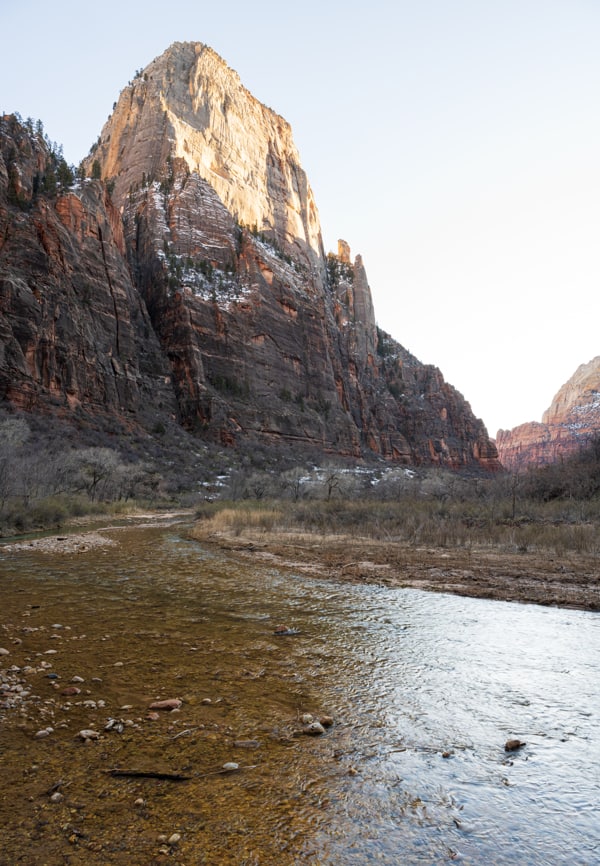
Riverside Walk
- Location: Zion Canyon Shuttle Route
- Best Time to Photograph: Morning and Late Afternoon
At the end of the Riverside Walk trail is the start of the popular Zion National Park hike called The Narrows.
To avoid the crowds we recommend hitting this trail in the morning. It’s also a good time when the contrast of the light isn’t too harsh to photograph the canyon walls, river and waterfalls.
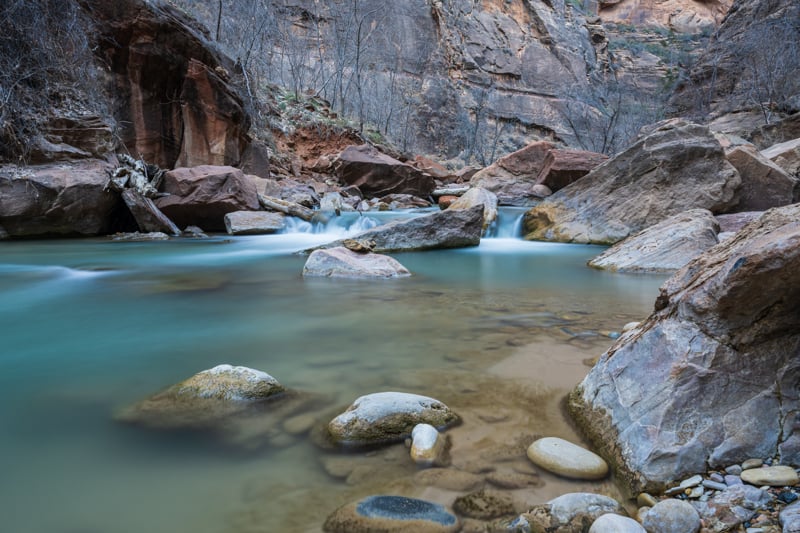
The high canyon walls provide a nice even light along the river in the morning which is perfect for photographing rivers and waterfalls.
Morning and late afternoon are the best times to avoid the sharp contrast of light on the canyon walls with the darker shaded areas.
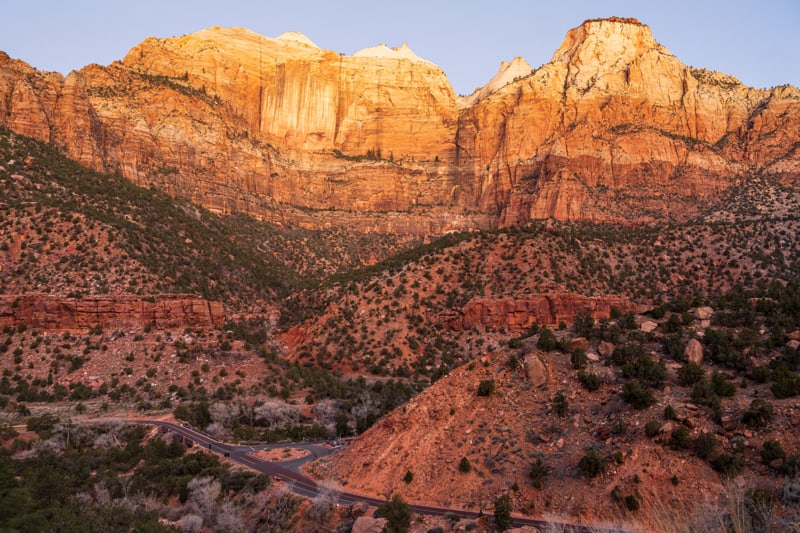
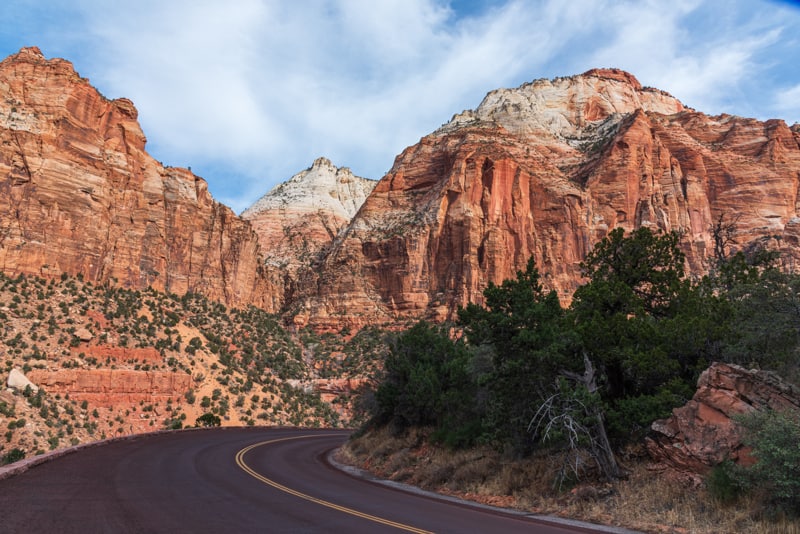
Zion-Mount Carmel Tunnel
- Location: Zion-Mount Carmel Tunnel
- Best Time to Photograph: Sunrise, Morning, Late Afternoon and Night
The stretch of road from Zion Canyon to the Zion-Mount Carmel Tunnel is full of switchbacks. Be sure to stop along the pull-outs to photograph this part of the park! Give yourself plenty of time to make your way along this Zion National Park scenic drive!
The pullouts along this stretch of road provide wonderful sunrise photography views to capture the light on the tops of the cliffs.
The switchbacks and turns along this road make it a great spot to capture light trail photos!
Be careful taking pictures at night at Zion National Park, especially if you’re parked on a blind curve.
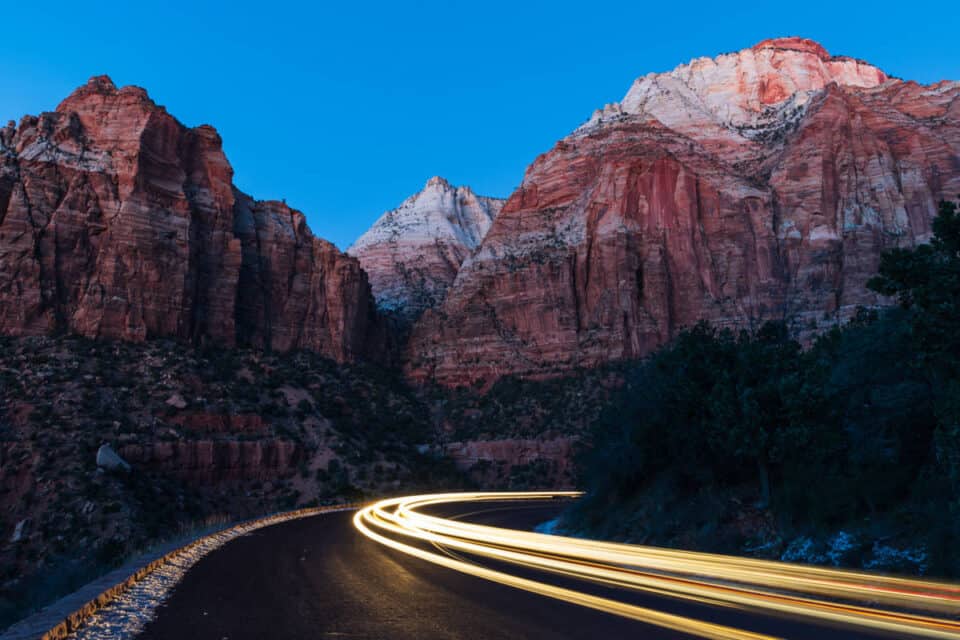
Early morning and late afternoon you won’t have as much traffic on the road making it easier to find an open pullout.
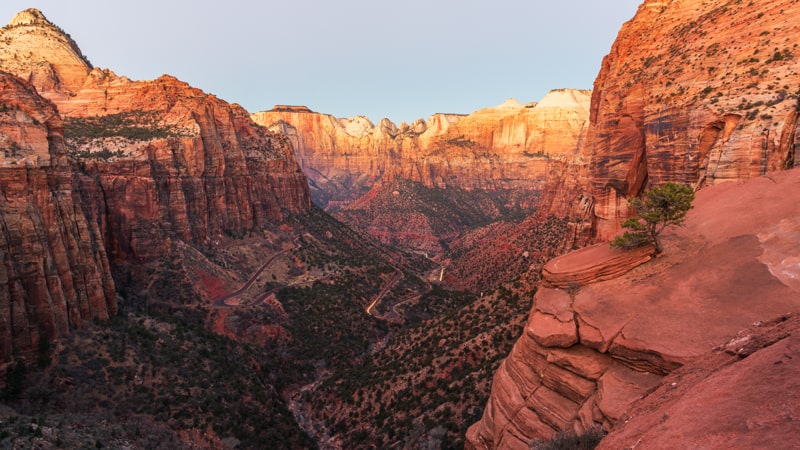
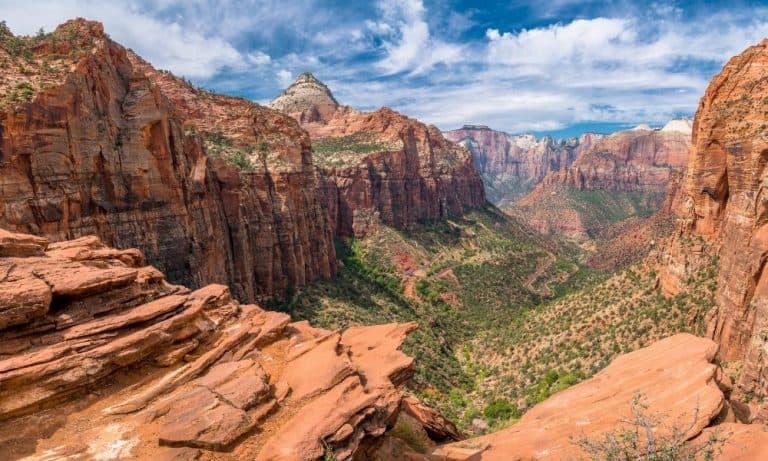
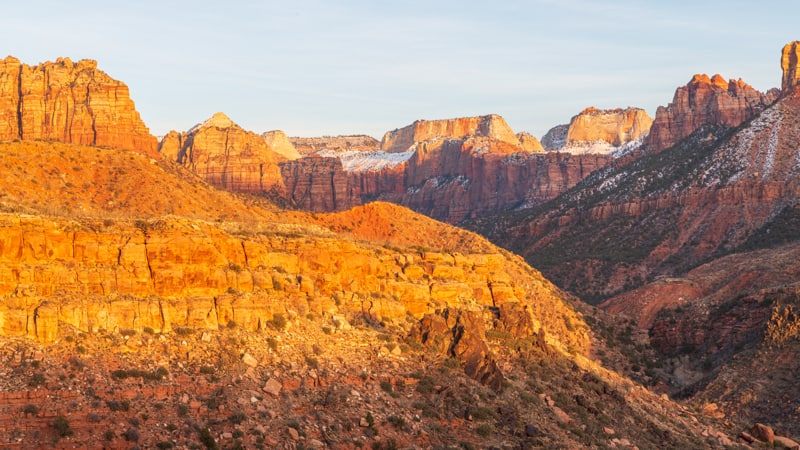
Canyon Overlook Trail
- Location: Highway 9
- Best Time to Photograph: Sunrise and Morning
The Canyon Overlook Trail is one of the best sunrise spots at Zion. It does require you hike a short, easy trail, but the reward is a stunning view of the main canyon with first light hitting the East Temple just above!
*The parking for this hike is VERY limited so early morning is the best time! It’s one of the Zion hikes without the shuttle you can do!
Start your hike an hour before sunrise so you’ll be at the overlook in time to capture the glow on the tops of the mountains across the valley. You’ll need a headlamp for the first part of the hike.
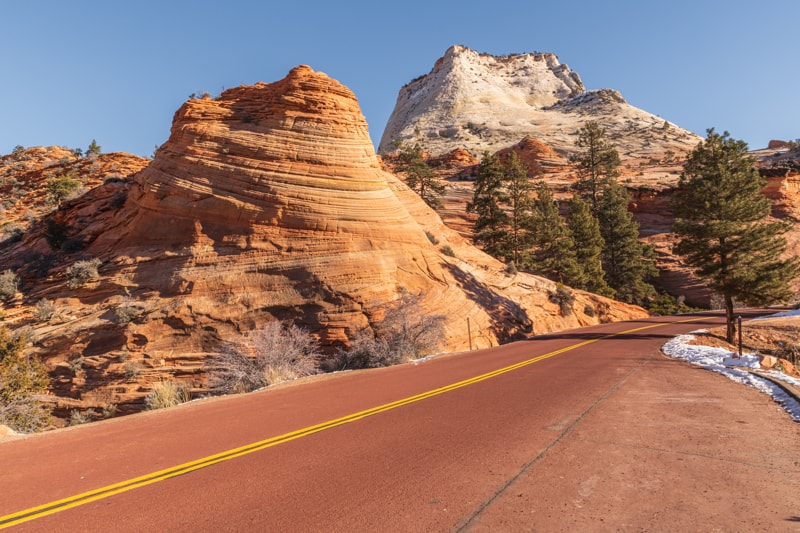
Zion National Park Highway 9
- Location: Highway 9
- Best Time to Photograph: Morning and Late afternoon
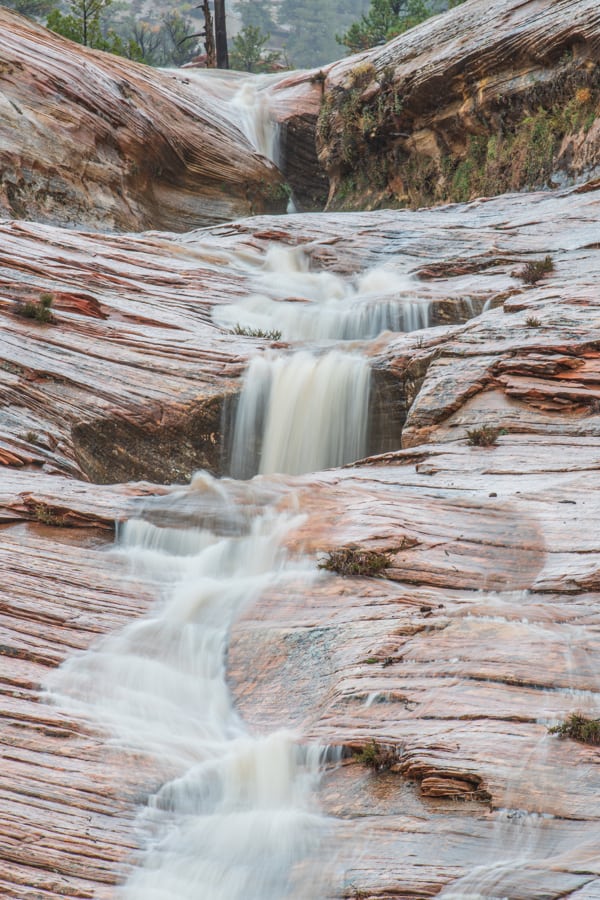
Highway 9 from Zion Canyon toward the East Entrance is a fun drive with amazing landscapes that are so different from what you see in Zion Canyon!
Take your time, stop at pull-outs along the scenic drive, and photograph anything that catches your eye!
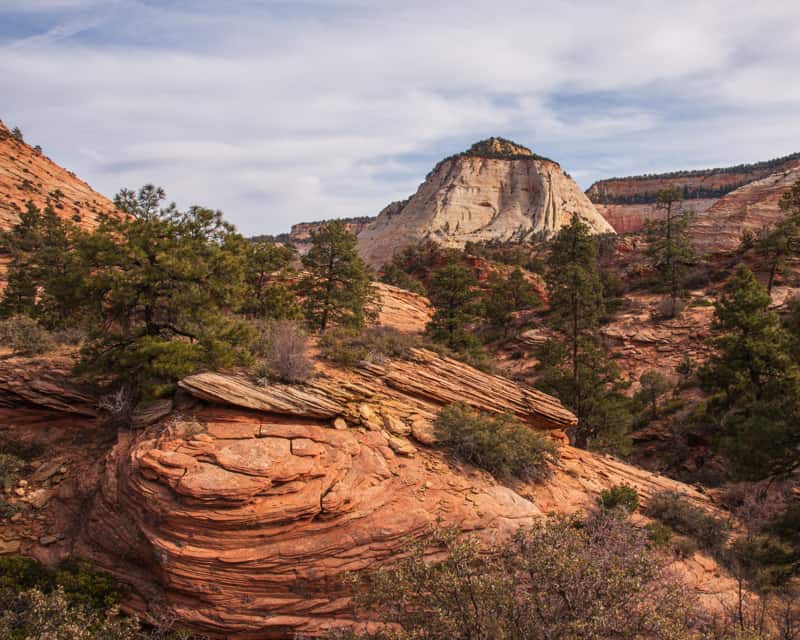
Morning will be the easiest time to find open spaces to park at the various pullouts. When you stop at pullouts, walk around the area to find unique ways to compose the photos you take.
If you’re lucky to visit when it’s raining, you may get to experience pop-up waterfalls!
Checkerboard Mesa has a designated parking area that makes it easy to stop right near the East Entrance.
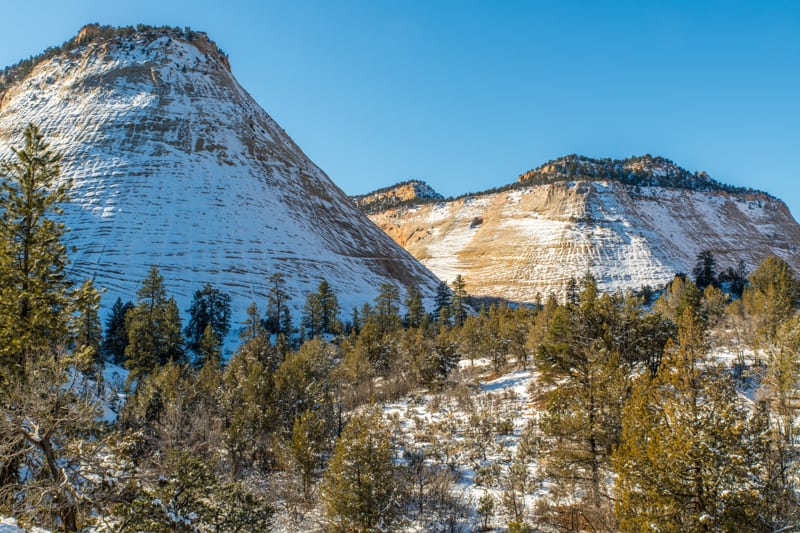
Zion National Park in the winter is so beautiful with the contrast of white snow against the colorful landscape!
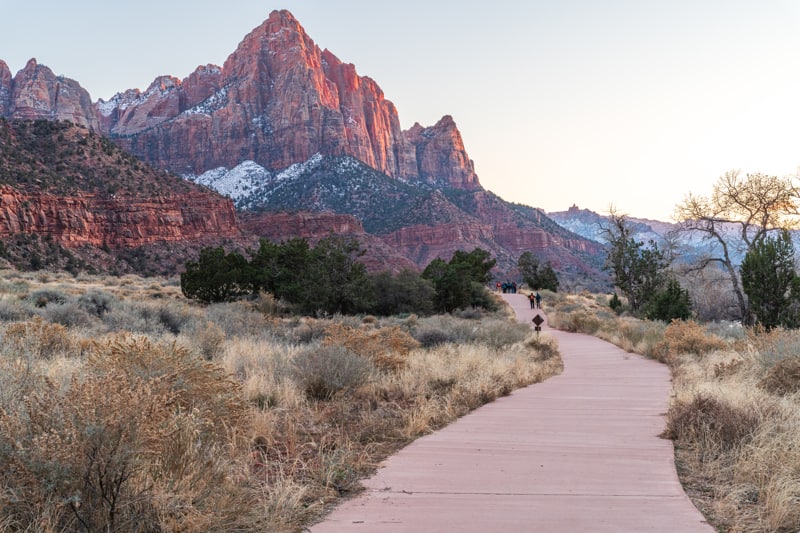
Pa-rus Trail / The Watchman
Location: Visitor Center
Best Time to Photograph: Morning, Afternoon, Sunset
The Pa’rus Trail runs along the Virgin River and provides that iconic sunset view of The Watchman. Access the trail near the Visitor Center – watch for the signs.
In the late afternoon and around sunset there’s golden light on the Watchman. Capture the golden reflection in the Virgin River for a stunning shot!
The trail follows the river and there are many spots with river access that provide a variety of views of The Watchman.
Take time to explore the area and look for different ways to photograph the landscape!
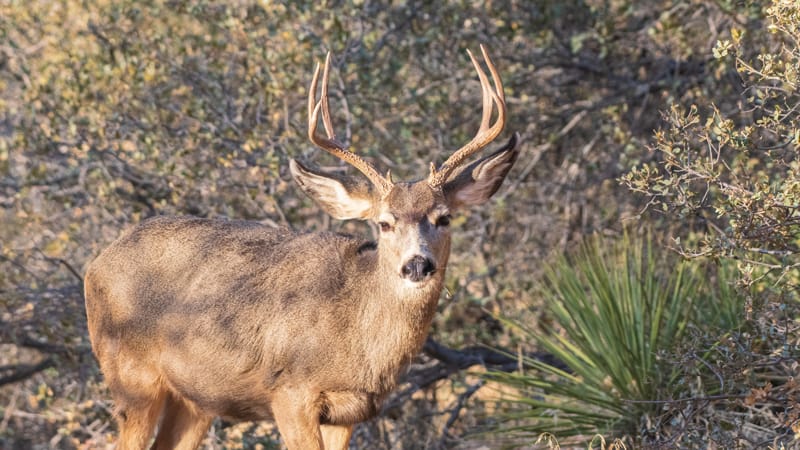
You’ll see deer along the trail in the evening so be prepared to photograph wildlife too!
Kolob Terrace Road
- Location: Kolob Terrace Road
- Best Time to Photograph: Sunset and Night
Kolob Terrace Road is amazing in the late afternoon and around sunset. Access this road near the town of Virgin, just west of Springdale.
Park at the Left Fork trail and walk a short distance to see this amazing view! The reflected sun on the landscape is just stunning!
Keep driving along the road until you get to the Hop Valley Trailhead. You’ll find stunning views of the valley from the ridge that lights up at sunset.
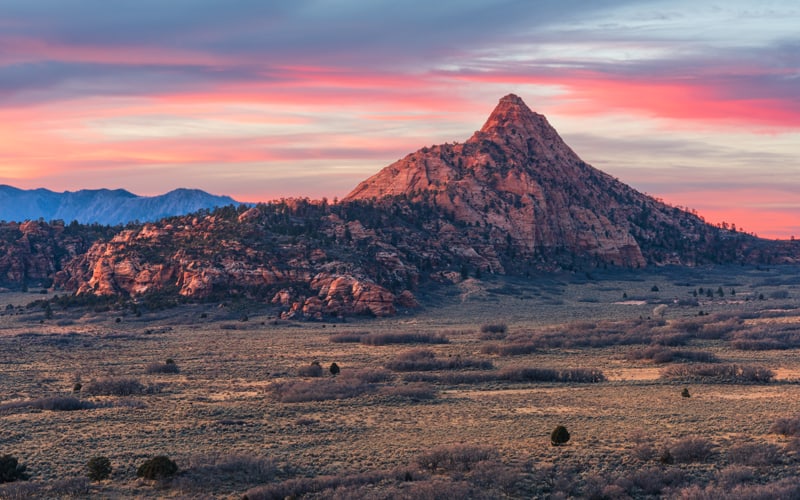
“Hoodoo City” is a favorite photo spot at Zion for us. It’s just east of the Hop Valley Trailhead. You can hike from the trailhead, or park at a pull-off about ½ mile to the east. Hike along the shelf above the valley until you find a spot to access the hoodoo formations below.
This is also a nice location to photograph the hoodoos with the night sky!
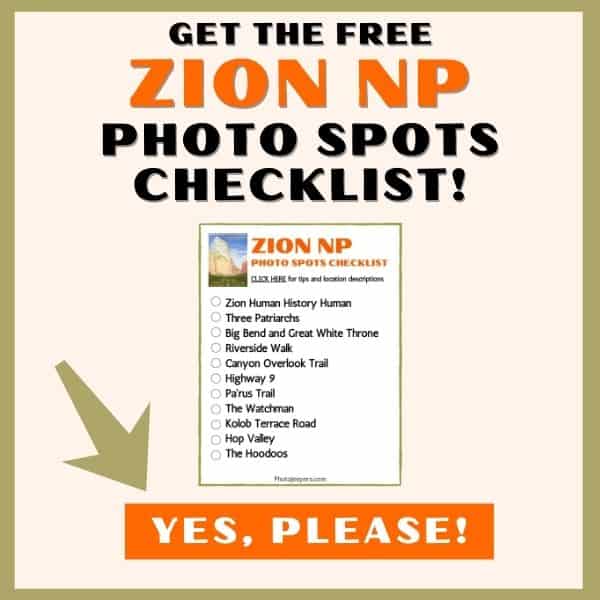
That’s it! Our list of amazing photo spots we recommend at Zion National Park! Be sure to grab your free Zion Photo Spots checklist to download, print, and take with you to the park!
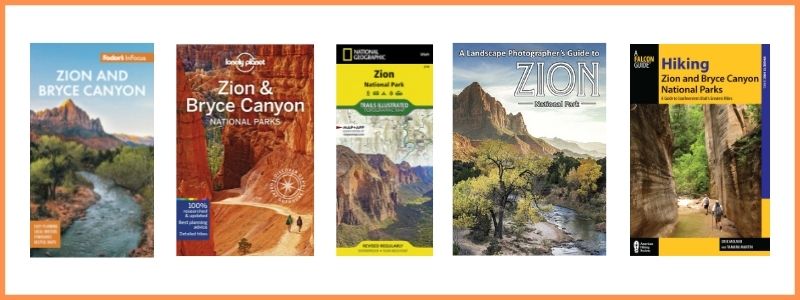
BUY ZION GUIDES & MAPS AT AMAZON
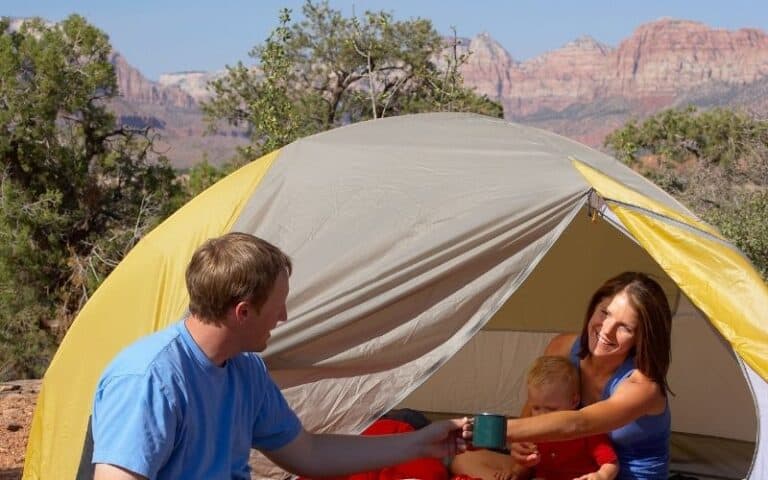
Packing List for Zion National Park
Use our Zion National Park Packing List to make sure you have the right clothing and gear for visiting any time of year! Grab your free printable packing checklist by clicking the image below!