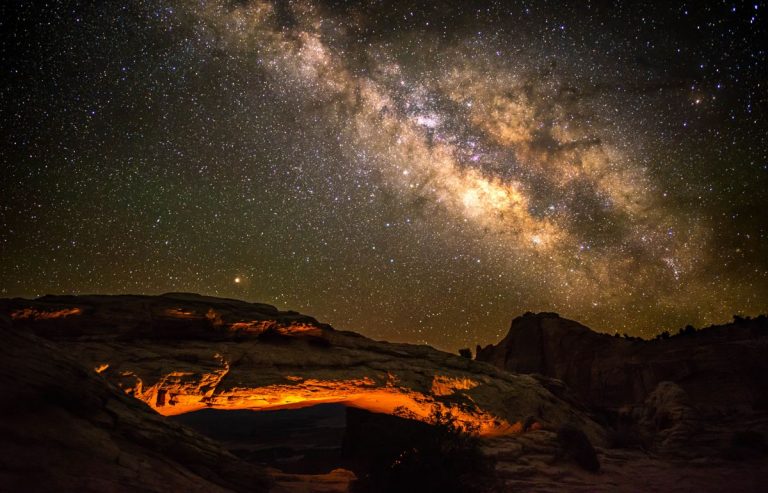
Horizon Line Photography Ideas
Take a look at the Horizon Line photography ideas to illustrate Low Horizon Line, High Horizon Line and Centered Horizon Line.
Placement of the horizon within your image is a basic photography technique for composition.
Horizons are the most common horizontal line to be found in photographs. They usually act as a dividing point in the image to anchor the rest of the photo.

It’s important to understand how horizon lines are used for landscape photography.
Equally important is making sure the horizon line is level so the viewer doesn’t feel the need to tilt their head when looking at the photo.
This site contains affiliate links which means WE may receive commissions for purchases made through these links. We only provide links to products we actually use and/or wholeheartedly recommend! As an Amazon Associate, we earn from qualifying purchases. Read the full Disclosure Policy.
Camera Gear for Landscape Photography
- Tripod: take a look at these compact and lightweight travel tripods!
- Camera Bag: protect your camera from sand and water → We use Lowepro camera backpacks for outdoor photography.
- Neutral density filter: to compensate for variance of light you’ll need to use a neutral density filter. → Check out the Kase magnetic filters we use!
- Camera cleaning kit: remove dust or water that WILL get on your lens. NOTE: this is not for cleaning the sensor.
- Memory cards: purchase name brand memory cards since you’re trusting your images to the card! → We use Lexar and Sandisk!
- External hard drive: copy photos to a portable external hard drive ‘just in case’.
- Headlamp: use when taking sunrise and sunset photos!
Camera Gear at B&H Photo
Using Horizon Line in Landscape Photography
Learn all about horizon line photography and why it’s important.
Take a look at the horizon line photo ideas shared by members of our Facebook Group, Your Photography Journey.
WATCH the video as we discuss how Horizon Line is used in each image.
Horizon Line Photo Examples
Using Rule of Thirds to intentionally place the horizon line in your photo is a good composition technique. It will help to create a visually pleasing and balanced image.
Low horizon line
A low horizon line is used to emphasize elements such as a dramatic sky or subjects above the horizon.
Andrey Snurnitsyn placed the horizon along the bottom line of the rule of thirds grid so the dramatic sky could fill most of the space in the image.
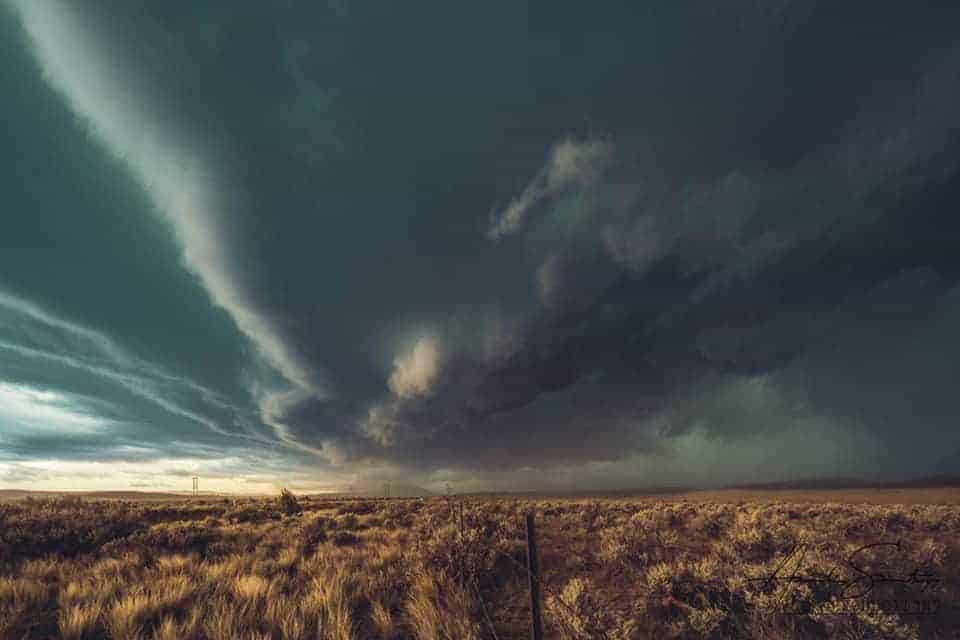
When you’ve got an amazing sky like this one here, definitely use a low horizon line.
Also notice the barbed fence used as a leading line toward the eye of the storm.
James Griffin composed the photo with a low horizon line so the colorful sky and silhouetted trees could be the main focus.

He also filled the frame with the trees to provide even more impact to the subject of this image. Notice how he kept all parts of the trees in the frame of the photo so the subject wasn’t cut off.
Bonnie Melnichenko also used a low horizon in her vertically oriented photo. The concept of horizon line works with both horizontal and vertical images.

The trees and golden background are the prominent subjects of the photo so placing the horizon low, she can include those elements in the picture.
The path is a wonderful leading line to guide the viewer’s eye into the scene.
High horizon line
A high horizon line tells the viewer that the foreground is the important part of the scene.
In this photo, Andrey Snurnitsyn placed the horizon along the upper line of the grid.
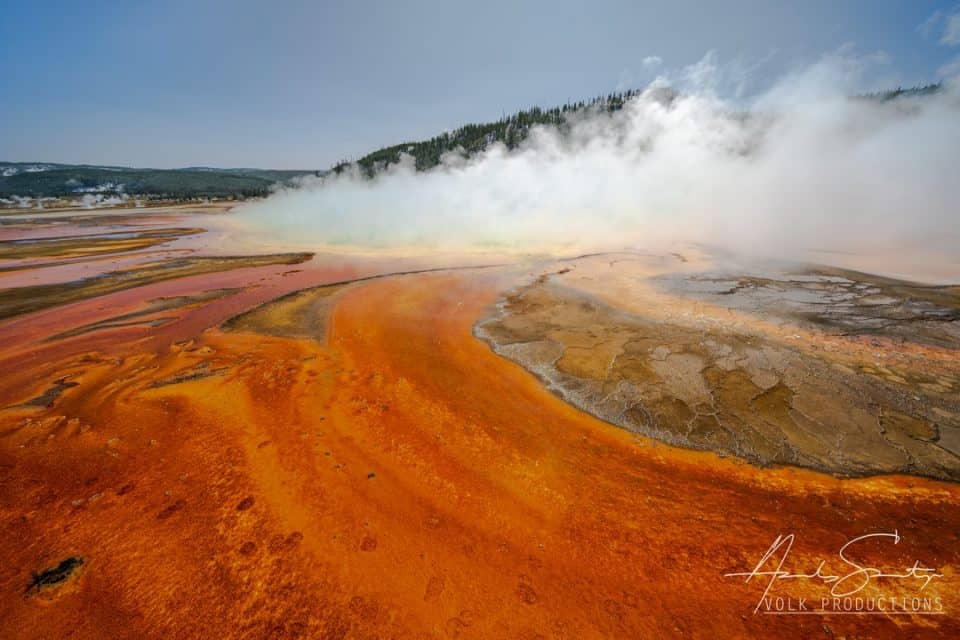
The colorful foreground of Grand Prismatic at Yellowstone is definitely the highlight in this scene, compared to the bland sky above the horizon.
Using the high horizon line puts the focus on all the area from the viewer to the horizon.
Roy Goldsberry used a high horizon line to focus on the sand dunes at Death Valley.
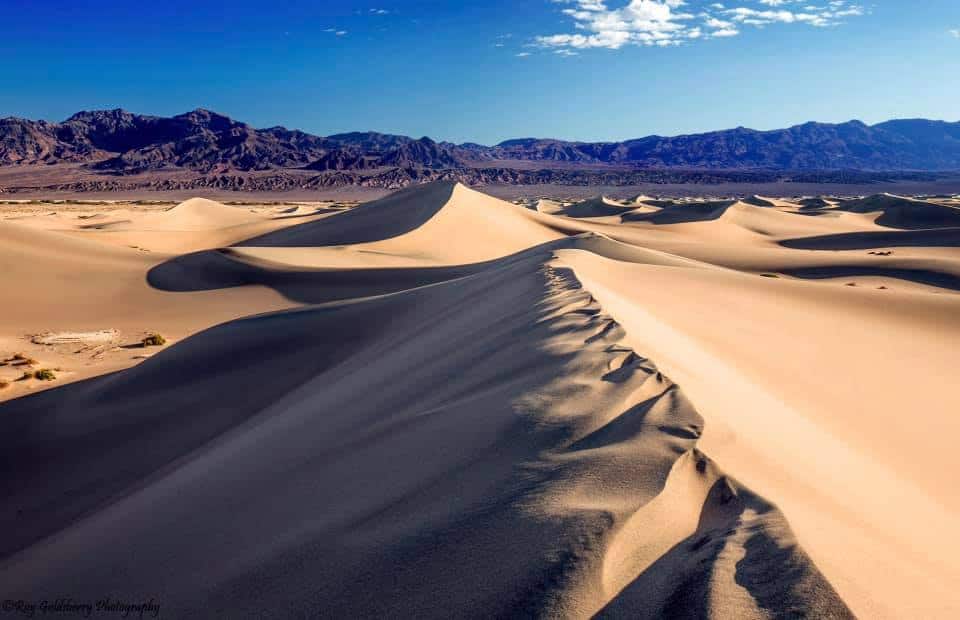
He composed the photo to include only a little bit of sky with a lot of foreground. The sand dunes are the most interesting part of this scene since the sky is a simple shade of blue.
Notice the leading line that’s created by the tops of the dunes that draw the viewer into and through the scene.
Richey Oliver’s photo puts the emphasis on the field, which is the foreground.
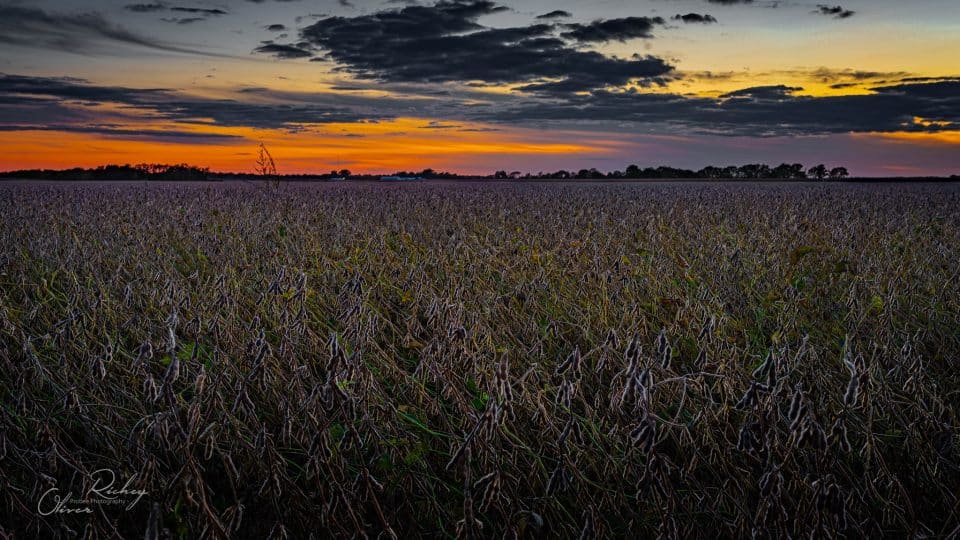
He put the horizon higher in the photo, but left a bit more room for the sky since it was colorful and the clouds were interesting.
And can you see the low perspective Richey used to highlight the plants in the field even more than from a standing position.
Centered Horizon Line
Put the horizon line in the center of image when you are shooting a scene with strong symmetry, such as a reflection in water. This technique also works when you have elements above the horizon and below the horizon that provide equal impact.
As mentioned above, a reflection picture warrants placing the horizon line in the center as James Carro did here.
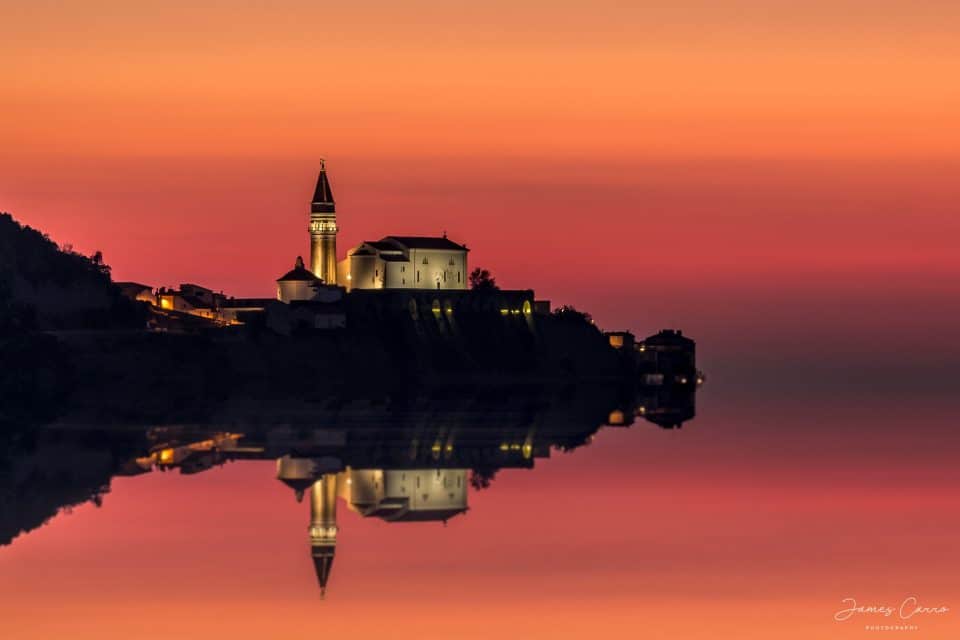
The horizon isn’t exactly in the center of the photo, which is fine. Placing it a bit lower down allows for more of the amazing sky to fill the space of the image.
And notice how he used the rule of thirds to place the tower close to the left vertical line of the grid.
James Griffin composed his photo with a centered horizon to put equal emphasis on the sky and foreground.
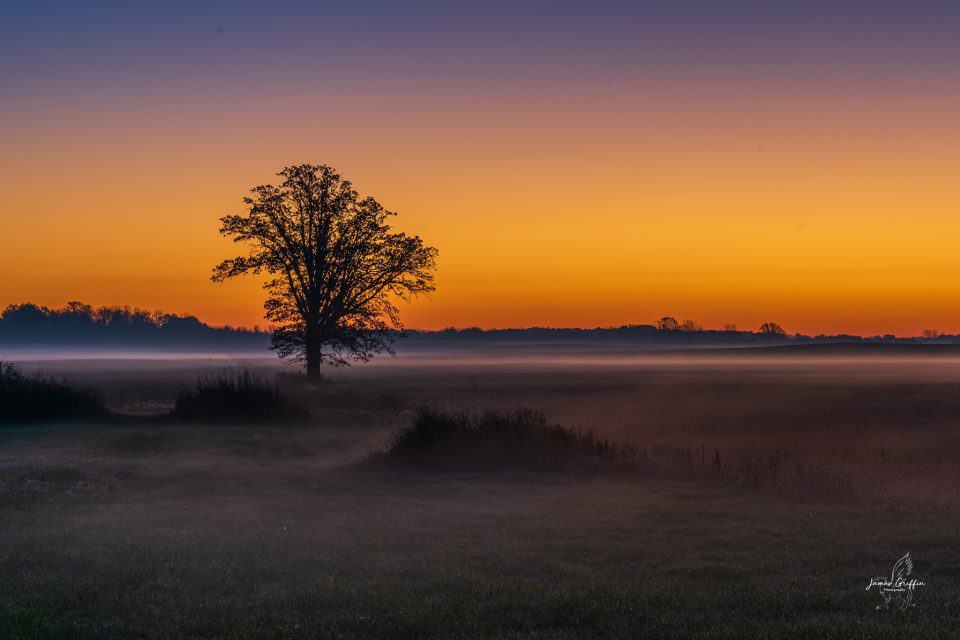
The area in front of the tree “grounds” the viewer then leads the eye toward the tree then on to the colorful sky. He’s incorporated the technique of using foreground – middleground – background in the photo beautifully.
James also placed the tree along the left vertical line of the rule of thirds grid.
In this photo taken by Daphne Brislin, the main subject is a rock structure found along the Oregon coast.
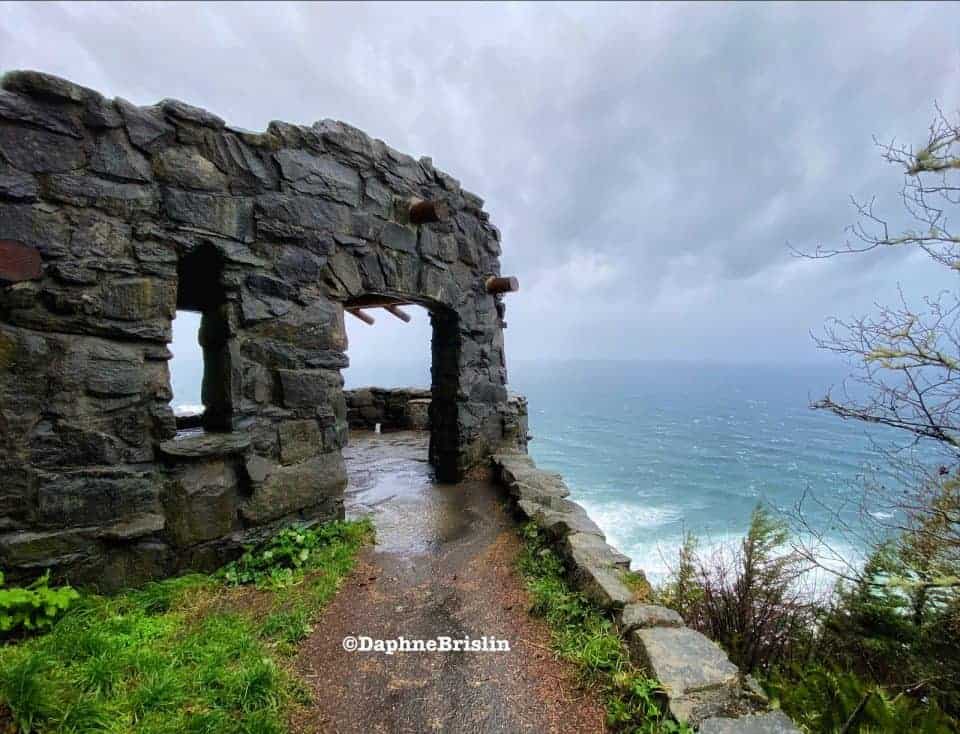
She’s using the path as a leading line into the structure, which then leads the eye through the opening out into the ocean background.
The horizon line isn’t as prominent in this photo as we’ve seen in the others so far, but it’s still an important element. It’s position in the center creates balance in the scene with the path, building and background.
Horizon Lines That Aren’t Low, High or Centered
As the photographer, you get to place the horizon wherever it looks best for the scene before you, and the image you want to capture.
Alfredo Cruz used the foreground plant to determine the frame of the scene.
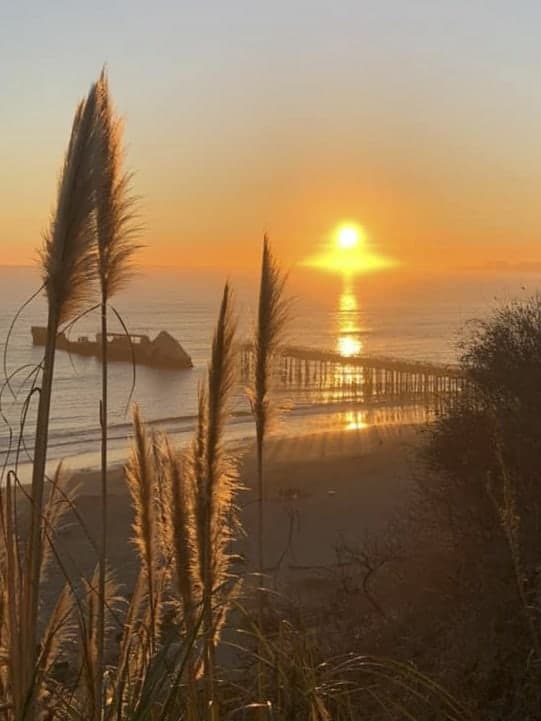
He found the perspective that worked best and used the rule of thirds to place the backlit plant on the left side of the image.
The sun and it’s reflection in the water is another key element in the photo, and provides balance with the foreground plant.
It doesn’t matter that the horizon line here is somewhere between the high and centered lines because all the elements combined work to create a well composed photograph.
Daniel Garcia composed this image to include important elements like the diminishing perspective and leading line of the pier, the line of the rolling waves, the reflected light along the water’s edge as well as the light from the sun along the horizon.

It’s worth your time to walk around the scene to find the best location to capture all the things you see and want to include in your photo.
The horizon line is an important part of this photo, and it works well where it is even if it’s not exactly a high or centered line.
Jeff Hall’s photo provides immediate impact with the golden hour light and silhouetted subjects!

The child on the beach and the setting sun are important subjects that he wanted to include in the photo. He didn’t worry about placing the horizon line is a certain spot. But he did make sure it was level!
Do you also notice the other silhouetted figures to the right? Jeff purposely included them in the photo to help tell the story of what’s happening at this moment in time.
What If There Are No Obvious Horizons?
in this photo by William Holmes, there are horizontal lines in the scene, even if the horizon isn’t as obvious as the others we’ve talked about so far.
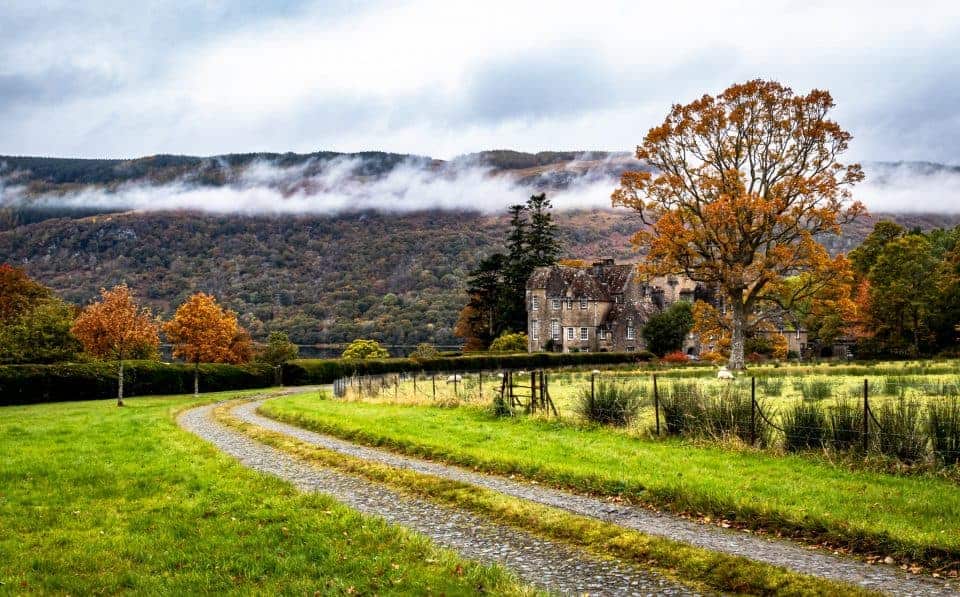
There’s the line going across where the house sits. There’s also a horizontal line with the clouds and the top of the hill.
You can also use the vertical lines of the trees, the house and the fence to help in making sure the image feels level.
There is no obvious horizon line in Jan Iron’s photo, yet the scene is balanced and not tilted. As a viewer there is no inclination to tilt my head to straighten the picture.

Sometimes you just have to do the best you can to capture a photo making sure the scene is straight and level.
In this instance, the clouds can help a bit. Or you can use the features in your camera or the level on your tripod to help as well.
AMAZON Landscape Photography Books:


