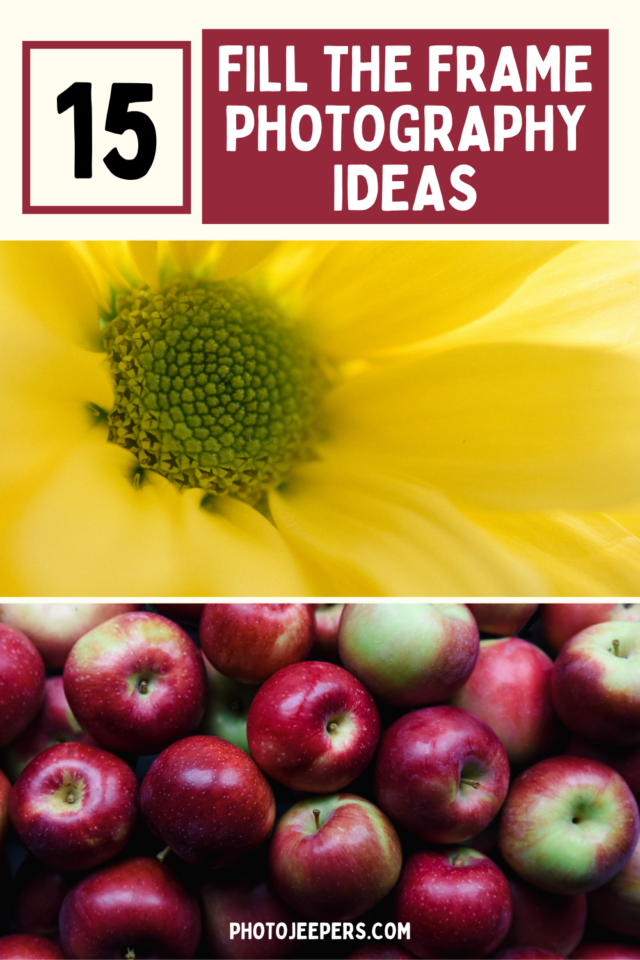
Fill The Frame Photo Ideas for Landscape Photography
Fill the frame photography is a technique used by photographers to draw attention to their subject and create impactful images. Take a look at the fill the frame photo ideas below to illustrate this compositional technique.
Composing an image using this basic photography technique means to get in close, to make your subject a significant portion of the final photograph.
What does Fill the Frame in photography mean? Basically, the frame refers to the edges of your photograph or the edges of the viewfinder of your camera when you are taking a picture.
It involves using your camera’s zoom lens or moving closer to your subject so that it takes up most of the frame, leaving little empty space around it. This helps focus viewers’ attention on the main subject and eliminates any distractions from the background or foreground.
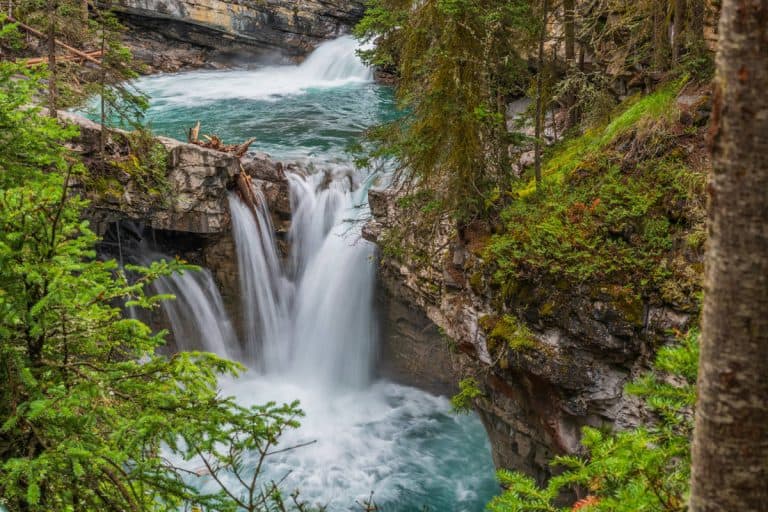
Use the photos and tips below as inspiration to get out and capture your own pictures that fill the frame!
Be sure to grab your free copy of our Photography Checklists by clicking the image below. You’ll get a packing list, settings list, and composition tips list that includes the top basic photography technique to capture amazing photos!

This site contains affiliate links which means WE may receive commissions for purchases made through these links. We only provide links to products we actually use and/or wholeheartedly recommend! As an Amazon Associate, we earn from qualifying purchases. Read the full Disclosure Policy.
Camera Gear for Landscape Photography
- Tripod: take a look at these compact and lightweight travel tripods!
- Camera Bag: protect your camera from sand and water → We use Lowepro camera backpacks for outdoor photography.
- Neutral density filter: to compensate for variance of light you’ll need to use a neutral density filter. → Check out the Kase magnetic filters we use!
- Camera cleaning kit: remove dust or water that WILL get on your lens. NOTE: this is not for cleaning the sensor.
- Memory cards: purchase name brand memory cards since you’re trusting your images to the card! → We use Lexar and Sandisk!
- External hard drive: copy photos to a portable external hard drive ‘just in case’.
- Headlamp: use when taking sunrise and sunset photos!
Camera Gear at B&H Photo
Fill the Frame Photo Ideas
The fill the frame photography technique encourages you to take time thinking about your subject and how best to feature that subject in your photograph.
- How can you bring attention to the subject, details or patterns that provide impact?
- How does the background add to or take away from the story that you are trying to tell?
Take a look at these Fill the Frame photo ideas to illustrate various ways to use this technique!

Get Close
In the above photo by Tony Kendrick, he filled the frame with fireworks. He composed the shot to zoom in on the bursts of light. And purposely let the streaks of color move off the edges of the picture. Filling the frame this way provides immediate attention to the subject in this photo.
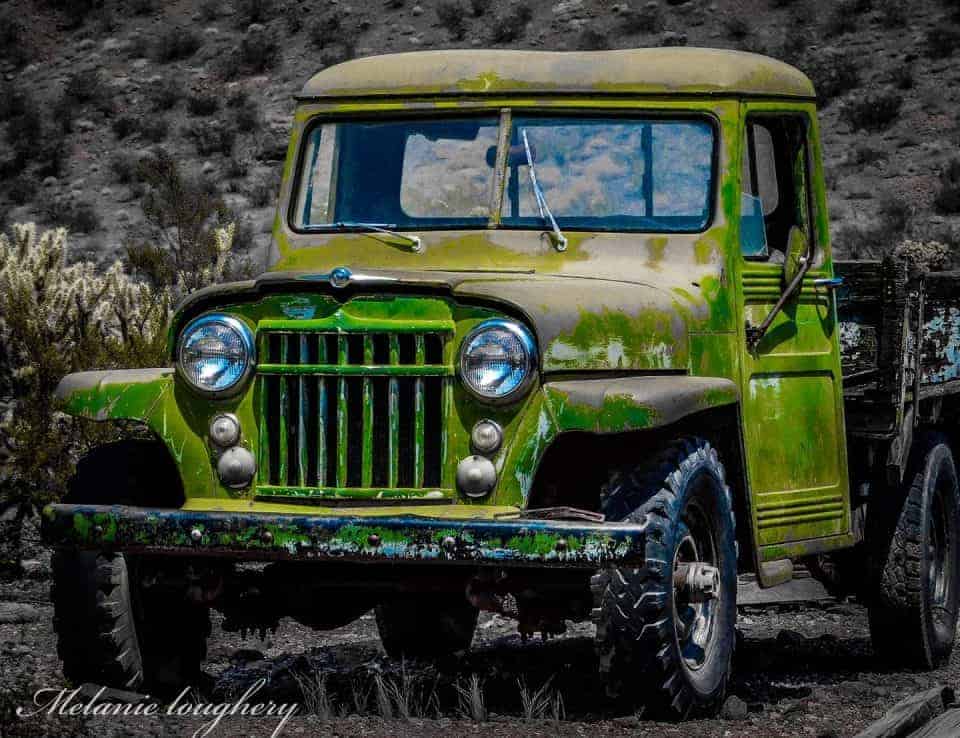
There is no doubt what the subject is in this photo above taken by Melanie Loughery. One of the best ways to get close to the subject is by moving your feet! Melanie used her feet to get close to the truck, as well as find the best angle or perspective. As she walked around, Melanie selected the view or angle that best represented the subject in her eyes at the scene.

Cindy Shaffer found an interesting part of the pine tree to focus on for the picture she took above. The viewer can easily see the pinecones in the photo because Cindy got the camera close to those parts of the tree. She filled the frame with a part of the tree, and in doing so, the viewer’s attention immediately goes to the pinecones in the photo.
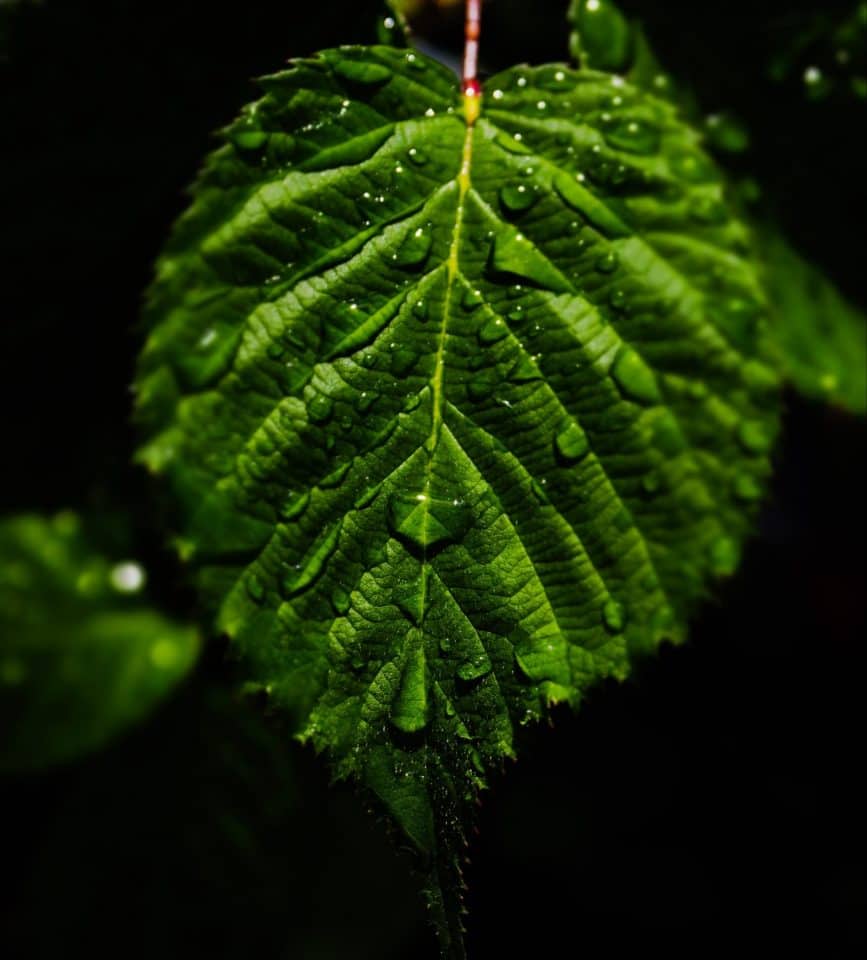
When we talk about getting close to fill the frame, focusing on a single part of the subject is what Melissa Jean Salisbury did in her photo above. Filling the picture with one single leaf makes it easy to know what the subject is. Getting close enough to the leaf for it to take up most of the space in the photo also allows the viewer to see the color variations, patterns and water drop details.

Get Even Closer
Jay Hasson got even CLOSER to the subject so only a part of the leaves was included in the frame. Do you see how the lines of the leaves and drops of water are even MORE prominent here? Jay chose to make this a black and white image which also helps accentuate the contrast between the lighter and darker elements in the picture.

And Delaney Van got RIGHT up to the leaf in the above photo! Now that’s darn close! In this picture, she filled the frame with a very small section of the leaf, so the focus is all on the water droplets. It’s also important to note that Delaney composed the drops to be in the upper left corner using the rule of thirds technique.
To get these up close shots (or macro photos), move your camera as close as you can to the subject. You can also use the zoom on your camera or use macro lenses or macro extension tubes.

Frame the Subject
Another reason to use this technique is to frame the subject like Bonnie Melnichenko did in the above photo. She framed most of the Epcot ball to fit within the scope of the image. There is no doubt what the subject of this photo is here. By filling the picture this way, the patterns and colors are brought forward to create interest for the viewer.

Jeff Hall wanted the focus of this photo to be two specific parts of the bicycle. He accomplished this by filling the frame with the two parts. The other, less emphasized parts of the bicycle can still be seen, but they aren’t the main focus. The surrounding elements aren’t distracting, and help tell the story of this picture.

James Carro draws attention to the girl and dog in this photo by using the fill the frame technique. James composed the picture with the most important parts of the subject: the girl and the dog looking at the girl. The dog’s face is what’s most important here, so there was no need to include more in this photo. Notice the contrast of darks and lights in the image when he turned it into a black and white photo!
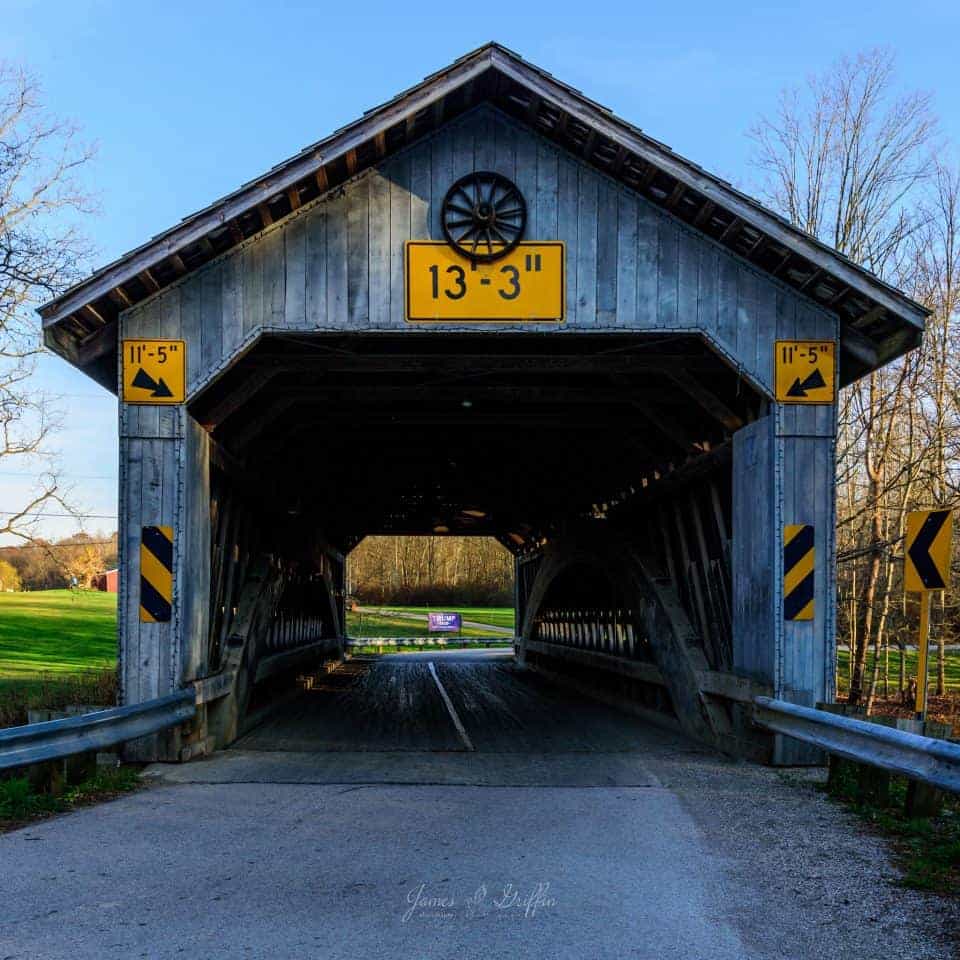
You Can Leave Room
When you Fill the Frame, you don’t need to fill it completely all the way to the edge. Leaving a bit of room for details will add context to the story, just as James Griffin did here. He included the road as a foreground element which leads the eye to the bridge, and helps tell the story of a road traveling through the bridge in the country.

Mel Simpson included ‘just enough’ room at the top of this photo to help tell the story. She was intentional in what was included in the frame. The spanned wings are the most important element here and they fill the horizontal width of the photo. The other birds at the top and in the background of this image add to the story of this location.
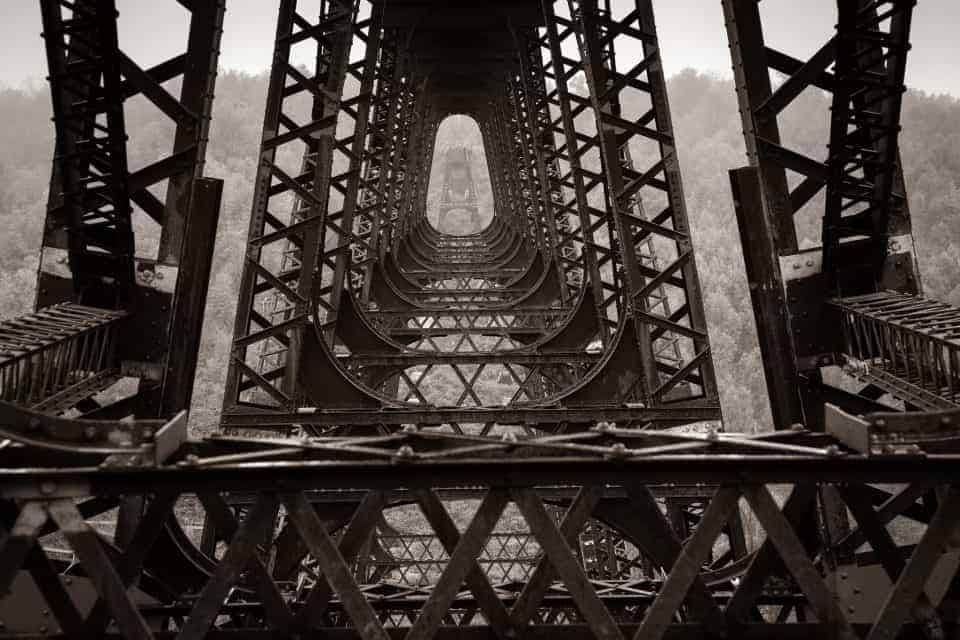
Be Selective
In the picture by Jan Irons above, she selected the part of the bridge with the most impact. This part of the bridge highlights the diminishing perspective of the lines and patterns as it moves through the photo. Jan showcases depth by filling the frame with this element of the subject.
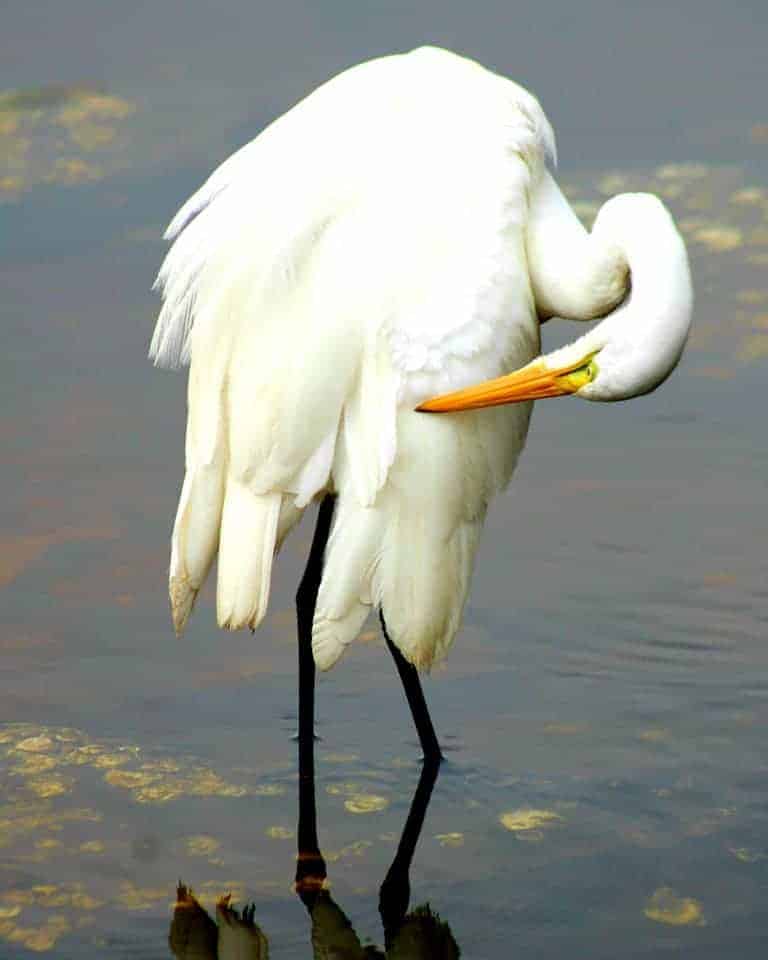
Ella Deaver was selective in what she included in this photo above. The bird fills most of the frame, but the water that’s surrounding the bird is an important element to tell more of the story. Adding the bit of reflection at the bottom helps to ‘ground’ the bird so it doesn’t look like a floating subject.
Be Aware of the Background
To help the subject stand out, it’s best to eliminate all distractions in the background. You can move or change your angle so the distraction is no longer in the frame.
If the background is busy, use a wide aperture to blur it so the subject stands out. Creating a bokeh is good especially if the background elements add to the story of the photo
In these two photos below by Goldhara McKay, the main subject stands out from the background.

She made sure the cactus and rabbit are perfectly in focus, while the background is blurred.

The background elements don’t distract from the subject in the photo, but rather they are a secondary element that helps the viewer know more about the setting.
AMAZON Landscape Photography Books:
Photography Challenges
The number one way to improve your photography is to practice! Photography challenges provide a subject or technique to find and photograph.
The challenge exercise helps boost your creativity and skills! Here are a few photo challenges to help you get out an practice! We also share fun ways to get the kids involved in photography!
- 52 Week Photography Challenge
- Spring Photo Challenge
- Summer Photo Challenge
- Fall Photo Challenge
- Winter Photo Challenge


Some really great photos! Thank you for the knowledge.