Best Arches National Park Photo Spots
If you’re looking for an unforgettable photography experience, Arches National Park in Utah is the place to go. Here’s a list of our favorite Arches National Park photo spots with tips for the best times to photograph each location.
We live close to Arches National Park so we’re able to visit often and know the best times of day to take photos at each location. Use this Arches National Park travel guide to help you plan a vacation: things to do, what to pack, where to stay and more!

With its iconic red-rock formations, hidden canyons, and amazing natural arches, this park offers a unique opportunity to capture stunning images of some of the most beautiful landscapes on earth.
From easy hikes with breathtaking views to more challenging routes that take you off the beaten path, there are plenty of photo spots that will give you something special to bring home from your visit.
Here are just a few of our favorite places in Arches National Park for capturing amazing photographs! Download the Arches Photo Spots checklist by clicking the graphic below!

This site contains affiliate links which means WE may receive commissions for purchases made through these links. We only provide links to products we actually use and/or wholeheartedly recommend! As an Amazon Associate, we earn from qualifying purchases. Read the full Disclosure Policy.
Camera Gear for Arches National Park Photography
We have a printed Camera Gear Checklist to help us pack all the equipment we need – that way we don’t forget anything!
- Cameras for Landscape Photography
- Lightweight Travel Tripods
- Camera Backpack: Protecting your camera from the sand and dust in Arches is essential. Using a camera backpack is so nice for hiking too.
- Graduated neutral density filter: There can be extreme differences in light around the various rock structures. To compensate for this variance of light you’ll need to use a GND filter.
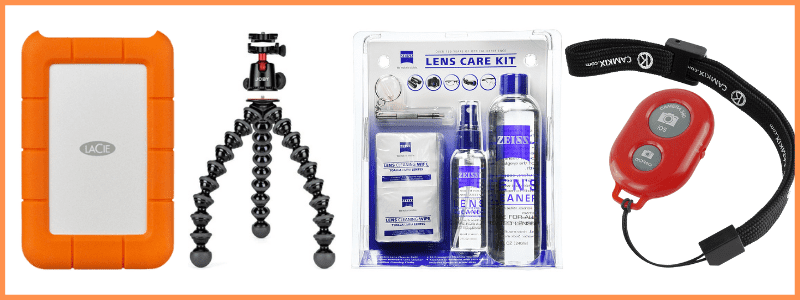
- Camera cleaning kit: You’ll want to remove dust that WILL get on your lens – this is NOT for cleaning the sensor.
- Memory cards
- External hard drive: Don’t forget to copy the photos to a portable external hard drive ‘just in case’.
- Headlamp with a red light: For the best sunrise, sunset or night sky shots, you’ll be navigating in the dark. Use a headlamp to light your way from the parking lot to your spot. Wearing a headlamp allows you to set up your equipment without having to hold a flashlight. Remember to use the red light setting and keep the beam pointed on the ground in front of you to avoid disrupting other photographers in the area taking long exposure shots.
Camera Gear at B&H Photo
A Photo Tour of Arches National Park
Take a visual tour through Arches National Park to see the stunning landscapes you’ll see when you visit!
Basic Information for Visiting Arches
Arches National Park is located in southeastern Utah just a few miles north of Moab. The park has over 2,000 natural stone arches, hundreds of stone pinnacles rising into the sky, immense rock fins and large balanced rocks.
The golden light at sunrise and sunset are amazing reflected on the red rocks! Arches National Park is also a well-known stargazing location.
You’ll need to reserve a Timed Entry Ticket for Arches National Park to enter the park from 6 a.m. to 5 p.m. daily from April through October.
If you don’t get a timed entry ticket, don’t worry. Plan to arrive before 5:30 am or enter after 5:00 pm, which is perfect for sunrise and sunset photography anyway!!
If you’re serious about taking the best Arches National Park photos…..
→ CHECK OUT our Arches & Canyonlands Itinerary and Photography Guide
Arches National Park Photo Spots
The unique landscape of arches, balanced rocks, fins and other slickrock formations makes it a photographer’s paradise! Here’s a list of the best places to take pictures at Arches in order as you enter the park.
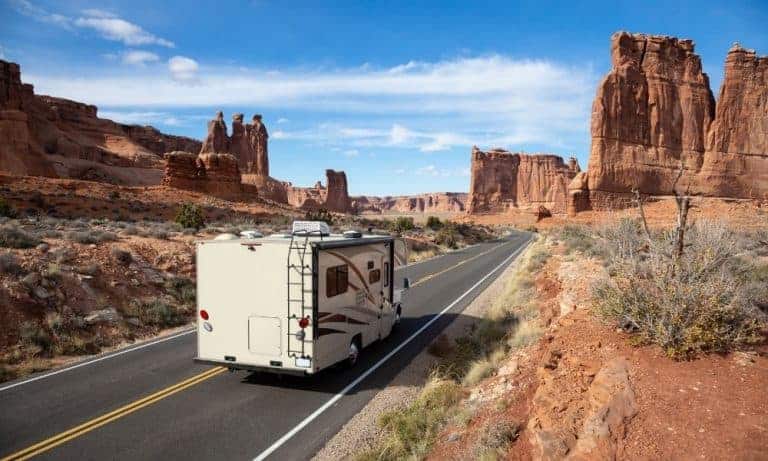
1 – Arches Scenic Drive
The Arches National Park scenic drive is 43-miles long, including the spur roads. Plan 2 to 3 hours for the drive itself, then add more time if you plan to do any serious photography or hiking.
The road is paved and offers Arches National Park photo spots from the pullouts along the road or in the parking lots. Some of the arches and landmarks can be reached by a short walk from the parking lot.
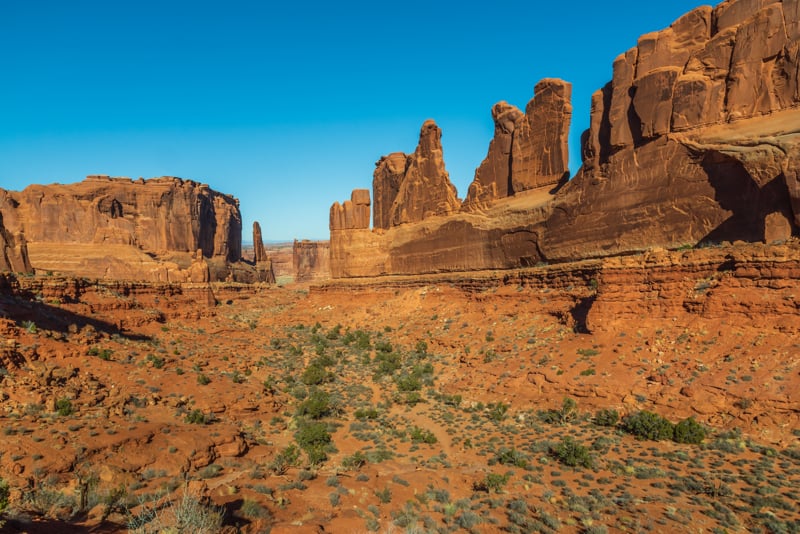
2 – Park Avenue
Park Avenue is the first stop as you travel along the scenic drive from the visitor’s center. From the parking area follow the wide, paved trail for about 100 yards to the viewpoint of Park Avenue.
When you follow the trail down and walk between the immense sandstone monoliths it feels like the real Park Avenue in New York City soaring skyscrapers on either side.
BEST TIME TO PHOTOGRAPH: middle to late afternoon when the valley is in shadow and the sun lights up the east wall.
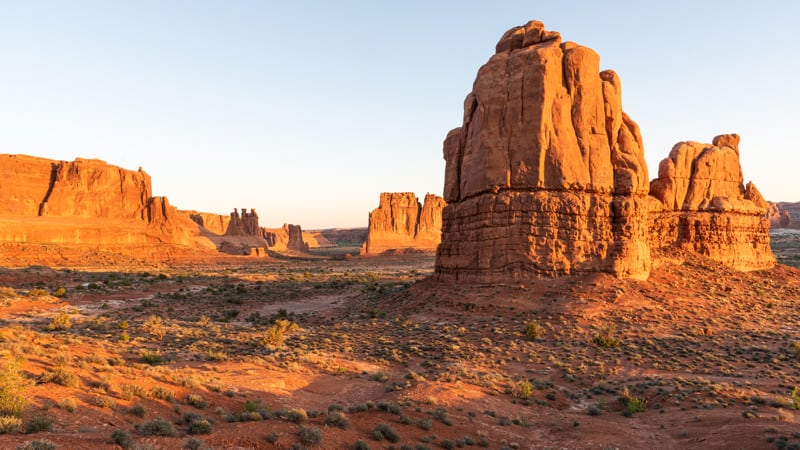
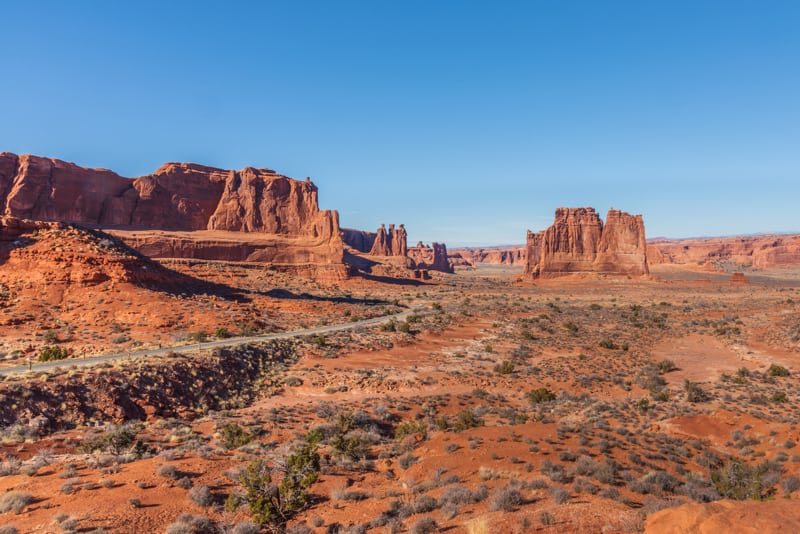
3 – La Sal Mountain Viewpoint
Enjoy a 360-degree view of the Three Gossips, Sheep Rock, and The Organ in the Courthouse Towers area. And along the horizon you’ll see a distant view of Balanced Rock and the Windows Section.
BEST TIME TO PHOTOGRAPH: sunrise is amazing to see the reflected light from the rising sun cast a warm red glow pm the formations.
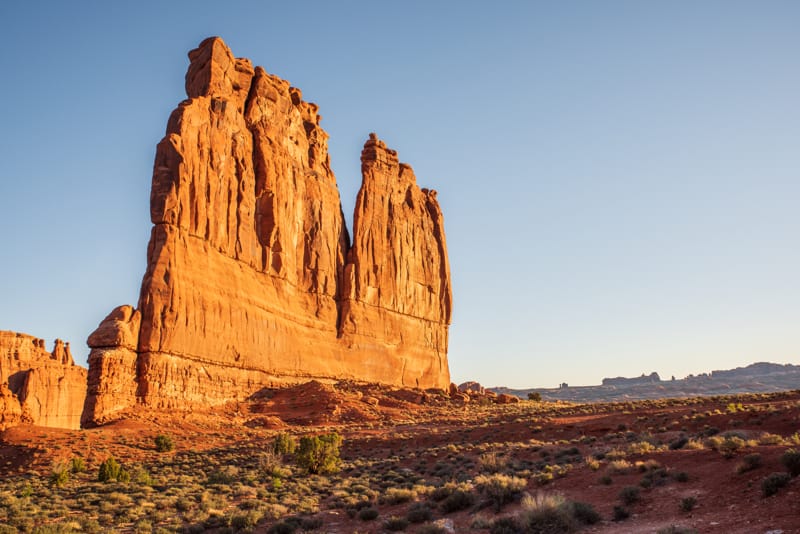
4 – Courthouse Towers
The Courthouse Towers area has unique rock formations to photograph: Three Gossips, Sheep Rock, and The Organ. We like the distant view from La Sal Viewpoint, but we also stop at the pullouts along the scenic drive to get up-close photos as well.
BEST TIME TO PHOTOGRAPH: sunrise is amazing with the warm light glow on the formations.
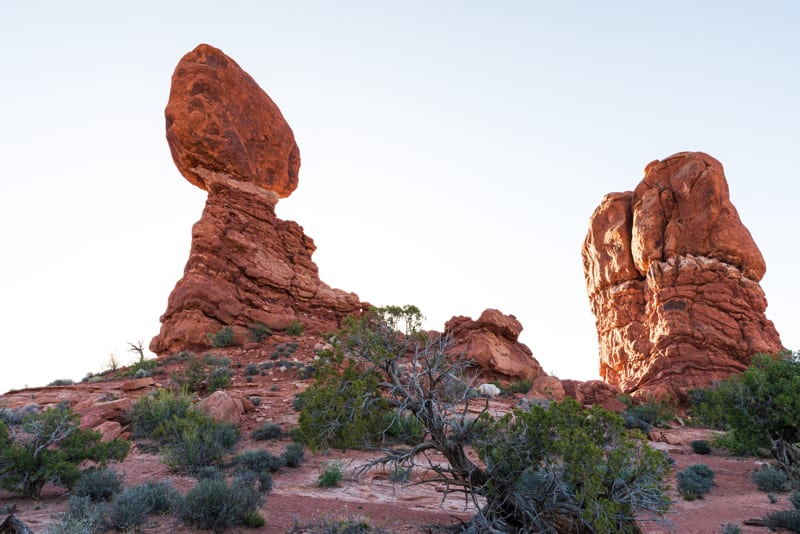
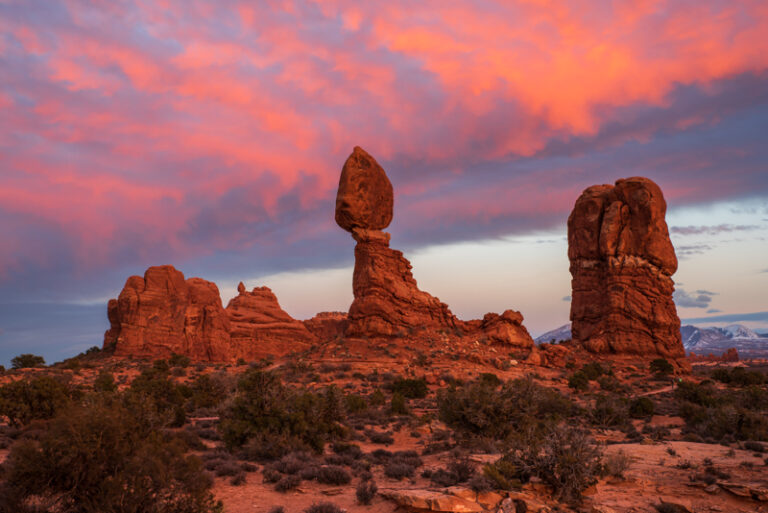
5 – Balanced Rock
Balanced Rock is a popular feature in the park. We recommend walking around the .3 mile loop around this landmark to capture the rock at various angles and perspectives.
We also stop at the various pullouts along the main road to capture different views of Balanced Rock.
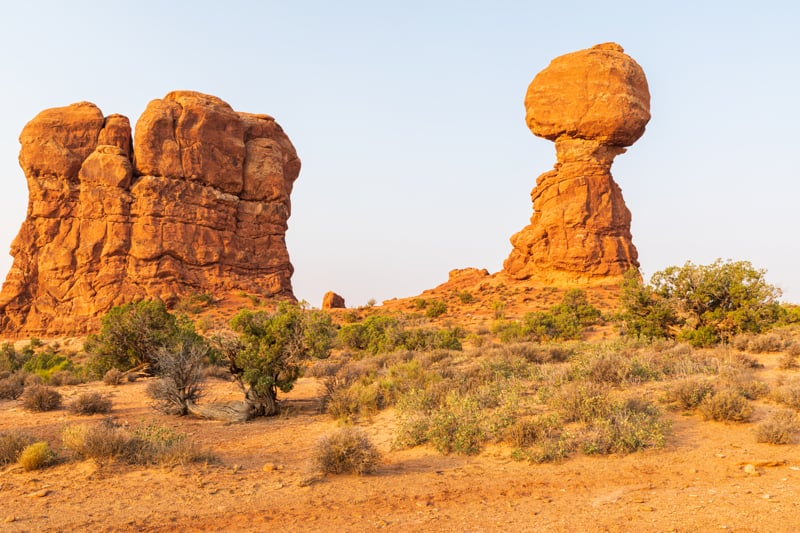
BEST TIME TO PHOTOGRAPH: sunrise, morning, afternoon and sunset are all good times here. In the morning you won’t have as many people hiking along the trail getting in your shot!
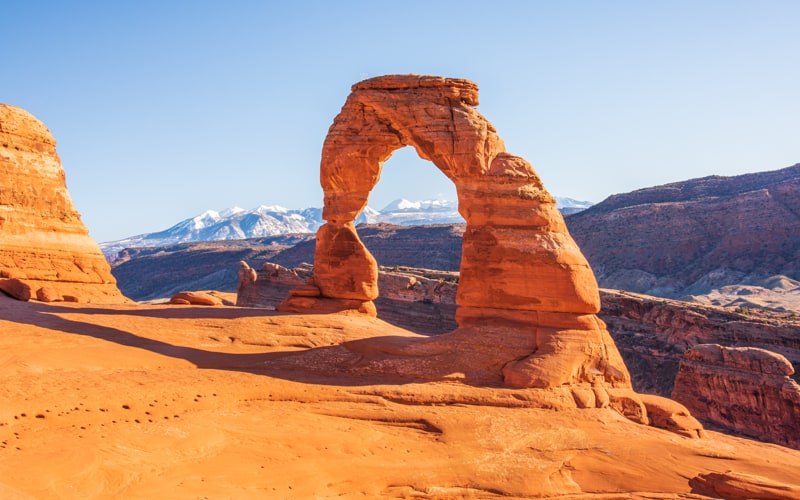
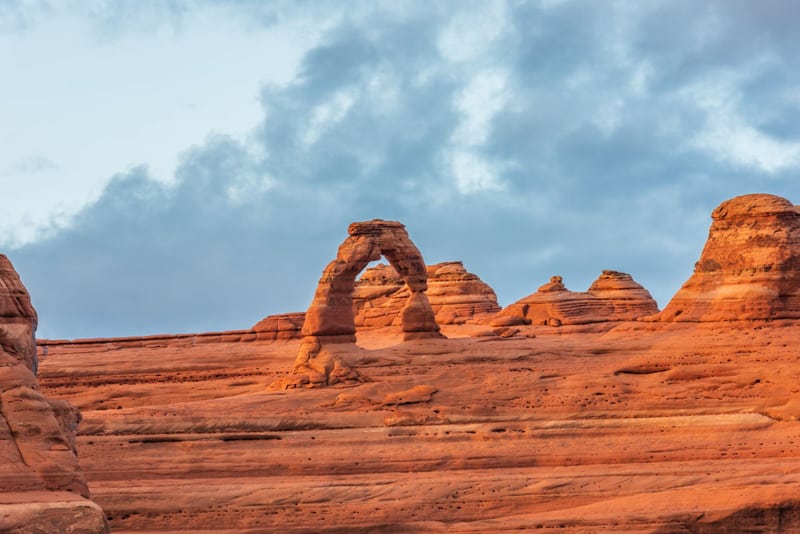
6 – Delicate Arch
Iconic Delicate Arch is a top Arches National Park photo spot. The impressive free-standing arch is a famous geologic wonder.
This arch cannot be viewed from the main road. To see Delicate Arch up close you must hike 3 miles roundtrip and climb 480 feet in elevation. The hike is mostly uphill and takes 1 to 1 ½ hours if you are reasonably fit. (Arches National Park hiking trails)
Or you can view the arch from a distance. There’s a short path at the Lower Delicate Arch Viewpoint to see the arch one mile away. You can get a bit closer by hiking to the Upper Viewpoint, ½ mile with some stairs.
Delicate Arch is a main attraction and will be busy all the time. It’s one of the best sunset spots in Arches so you’ll see photographers lined up along the bowl waiting for the magical moment. There could be hundreds of people in the small area during the summer.
PHOTO TIPS:
- Arrive at the Delicate Arch bowl at least an hour before sunset to get your spot.
- Walk around to find a unique composition.
- Take a headlamp for the hike down after sunset.
BEST TIME TO PHOTOGRAPH: sunrise and morning are nice and not as crowded, but you won’t get the orange glow on the entire arch and bowl that you get at sunset.
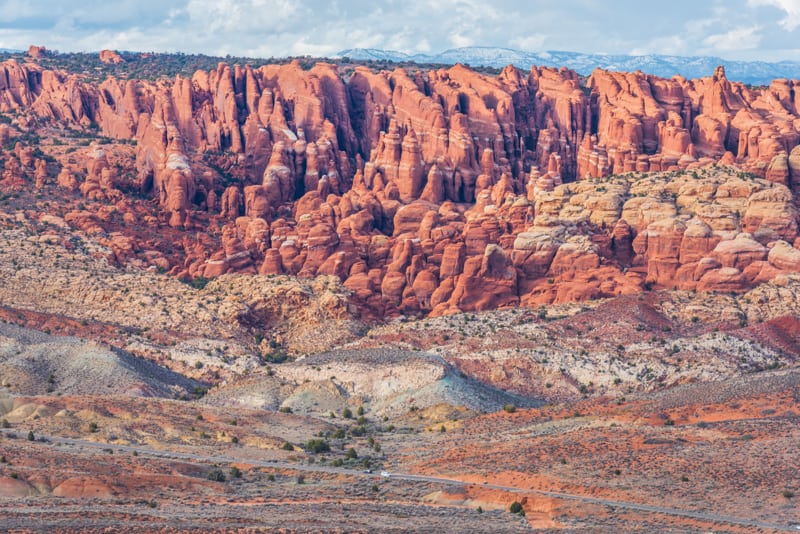
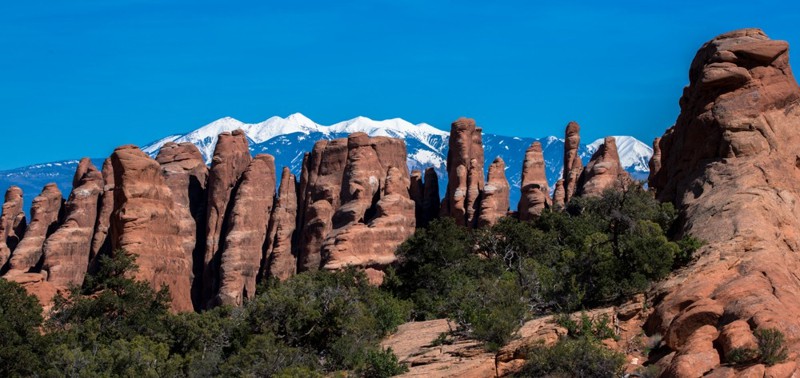
7 – Fiery Furnace
Fiery Furnace is comprised of narrow canyons and maze-like fins. Hiking here requires scrambling over slickrock boulders, walking through sandy trails, squeezing between rocks and navigating narrow ledges.
If that sounds too adventurous or you don’t have time, walk to the viewpoint from the parking lot to get an up-close view of the fins and spires. You can also get a good view of this area from Panorama Point.
BEST TIME TO PHOTOGRAPH: sunset you’ll see the rocks glowing from the setting sun.
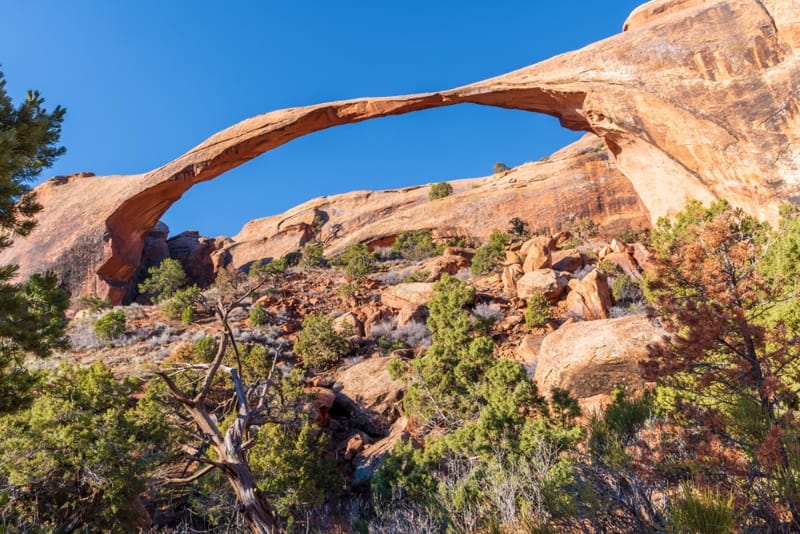
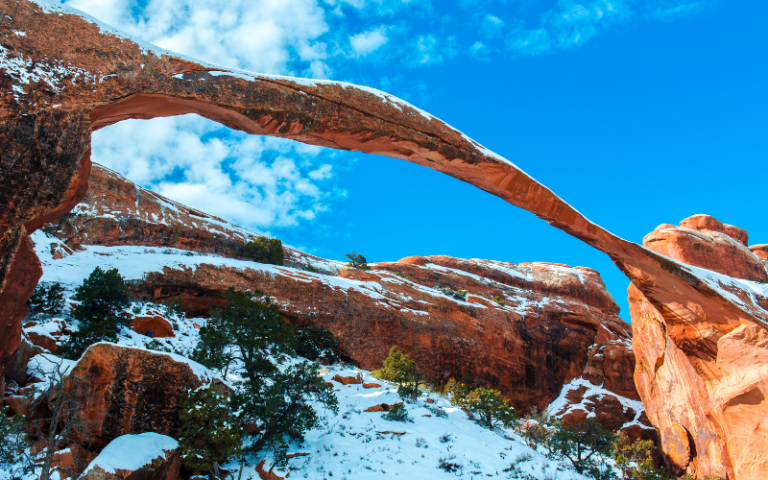
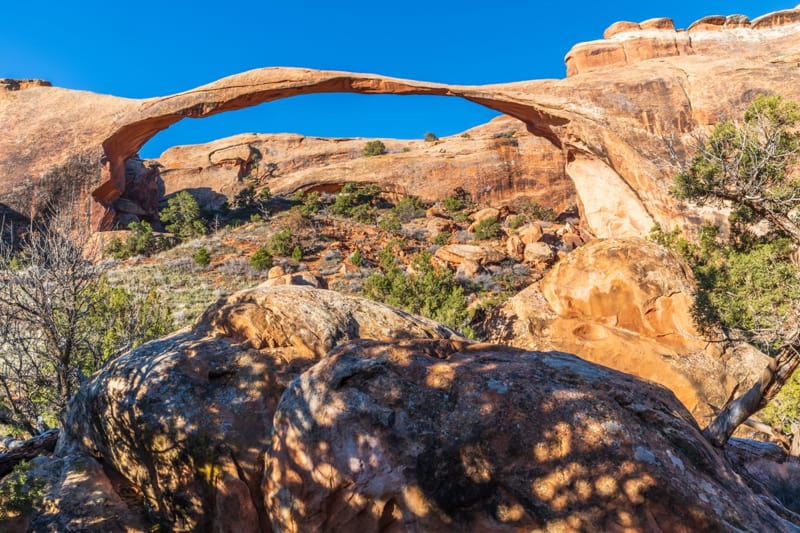
8 – Landscape Arch
To see Landscape Arch you’ll need to hike 1.6 miles along the Devil’s Garden Trail. This arch is longer than a football field and the thinnest part of the archway is 8 feet thick.
As you walk along the trail near the arch, you’ll see different perspectives so be sure to stop and photograph this arch from various locations.
There used to be a short trail that went under the arch, but falling rock from the underside has made it too dangerous for visitors to walk beneath the arch.
BEST TIME TO PHOTOGRAPH: no shadows on the arch late spring and early summer in early morning – the rest of the year at mid-morning.
9 – Devil’s Garden Trail
The Devil’s Garden trail is 7.2 miles round trip, including all spur trails, making it the longest maintained trail and Arches National Park hike. This area also has the largest concentration of significant arches in the world.
Most people will hike the trail to Landscape Arch then head back. There are spur trails to see Tunnel Arch and Pine Tree Arch before arriving at Landscape Arch.
Those who want some adventure will continue along the trail that requires climbing up and over long, narrow sections of slickrock, called fins, with steep drop-offs. This section of trail leads to Navajo Arch, Partition Arch and Double O Arch.
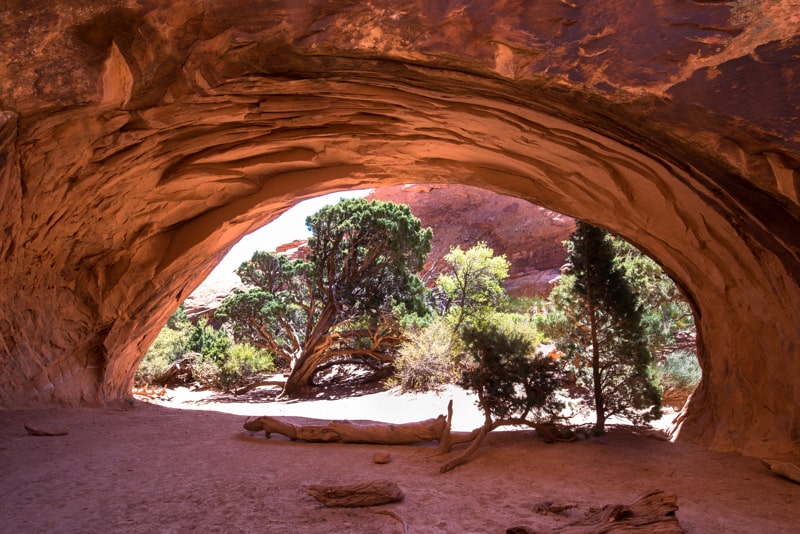
PHOTO TIPS:
- Navajo Arch: Capture the front, back and under-arch views.
- Partition Arch: Capture the front and back sides (there is a steep drop-off on the back side).
- Double O Arch: Pass through the lower opening of the arch and climb the slickrock on the other side to photograph the arch with sky as the background.
- Photograph the fins along the trail as these are just as amazing as the arches!
BEST TIME TO PHOTOGRAPH: sunrise and early morning you’ll have the best light, it will be cooler, and won’t be as crowded!
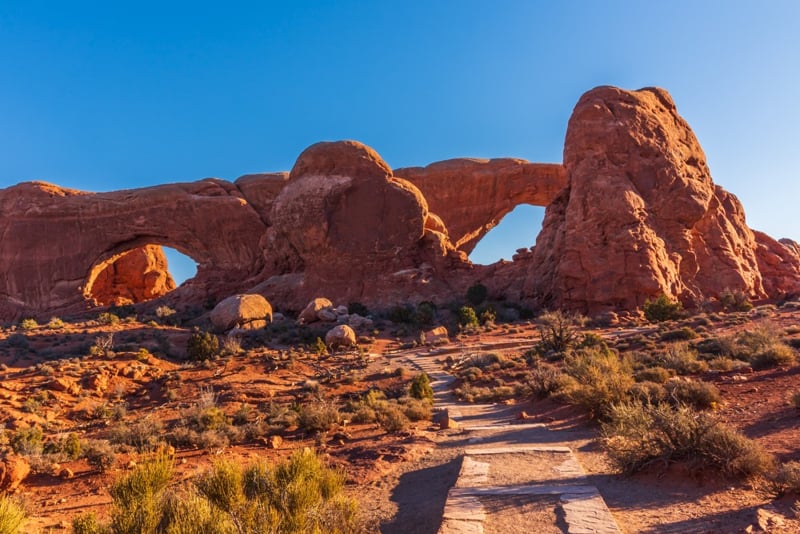
10 – The Windows
At the Windows area you’ll find the North and South Windows, also known as the Spectacles. There’s a primitive trail from the South Window to the back side if you want to see a different view of these arches.
We recommend you get here early if you want photos of the arches without people. The Windows area is a very popular Arches National Park photo spot.
BEST TIME TO PHOTOGRAPH: early morning and late afternoon
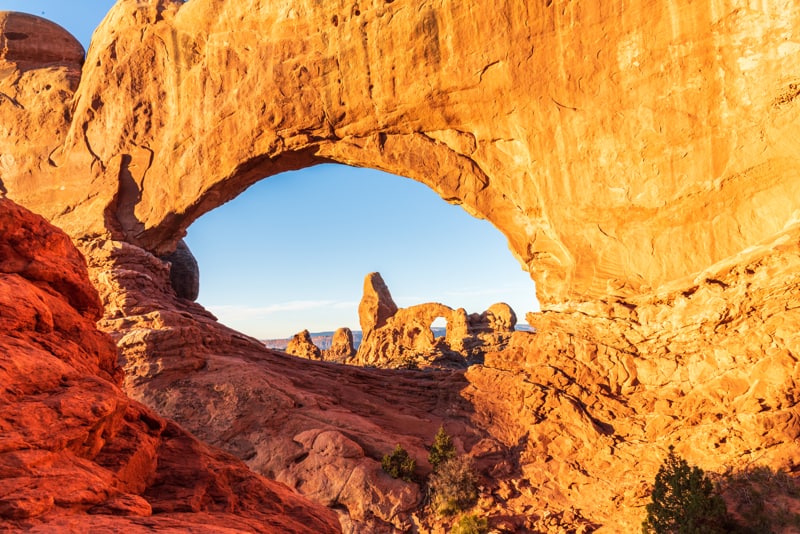
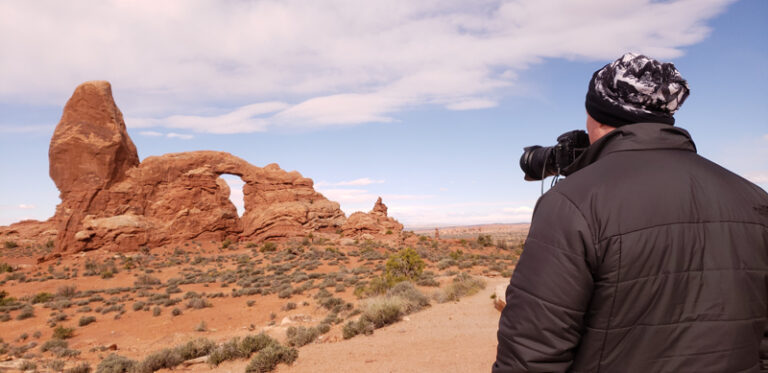
11 – Turret Arch
With a bit of precarious scrambling, Turret Arch can seen through the North Window, making it one of the best spots for sunrise at Arches National Park.
PHOTO TIPS:
- Photograph Turret Arch through the North Window.
- Capture various perspectives and images as you walk around and climb Turret Arch.
- Turret Arch provides a wonderful shape to complement milky way photography.
BEST TIME TO PHOTOGRAPH: sunrise, early morning, sunset and night or milky way photography.
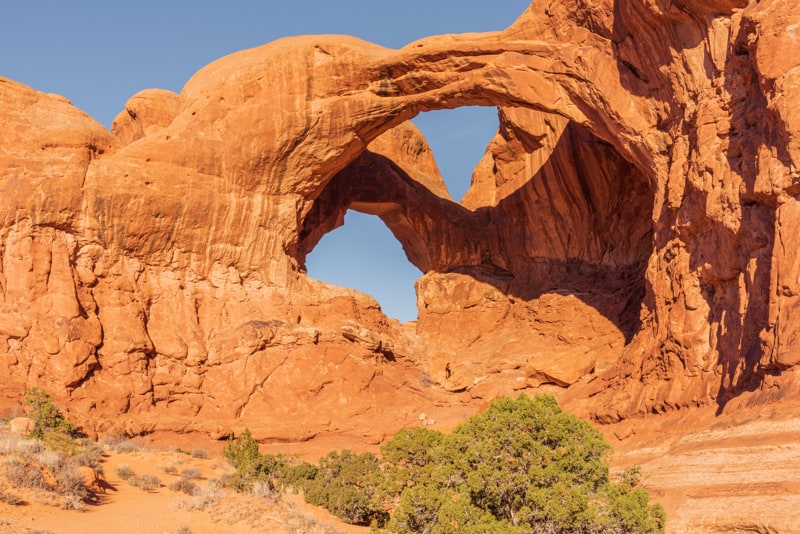
12 – Double Arch
Double Arch is two arches sharing the same stone foundation, formed by downward water erosion instead of side-to-side water erosion like most of the other arches in the park.
As you hike the short trail to Double Arch, look to your left to see the Parade of Elephants, a rock formation that resembles a herd of elephants holding each others’ tails.
This is a complicated formation that has lighting issues most of the day. Work with the shadows, foreground and scale to capture the arches the best you can.
If it’s crowded and you don’t want people in your shot, focus on the top part of the arches to create a unique perspective.
BEST TIME TO PHOTOGRAPH: early morning.
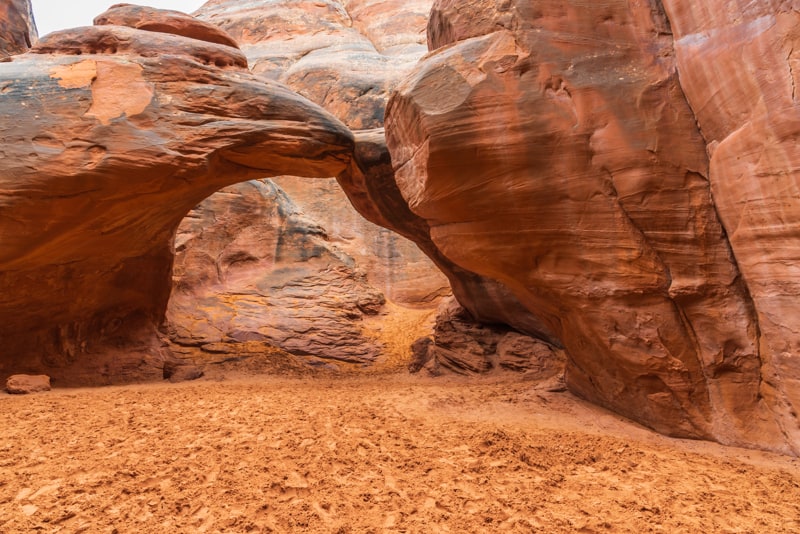
13 – Sand Dune Arch
When it’s hot, Sand Dune Arch is one place that usually has an area to provide shade and cool sand when visiting Arches National Park with kids. The easy hike takes you to a sandy area with many places to explore, play and hide. Do not climb on top of the arch as that’s against park policy.
BEST TIME TO PHOTOGRAPH: early morning or late afternoon when the sun isn’t directly lighting the arch between the fins.

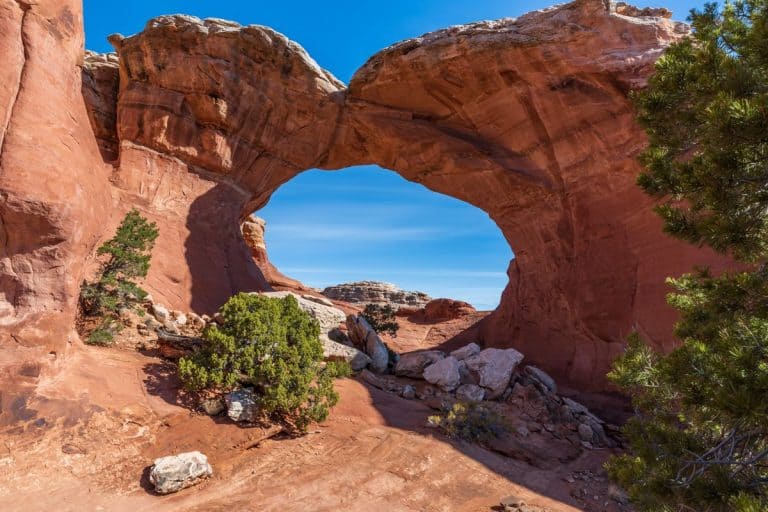
14 – Broken Arch
You can see Broken Arch from the parking lot at Sand Dune Arch. The trail is accessed from the same trailhead, It’s a fairly level hike most of the way, then has a few sloping sections as you get closer to the arch.
Be sure to take photos from the other side of Broken Arch if you can. There is a moderately steep slickrock section to get through the arch.
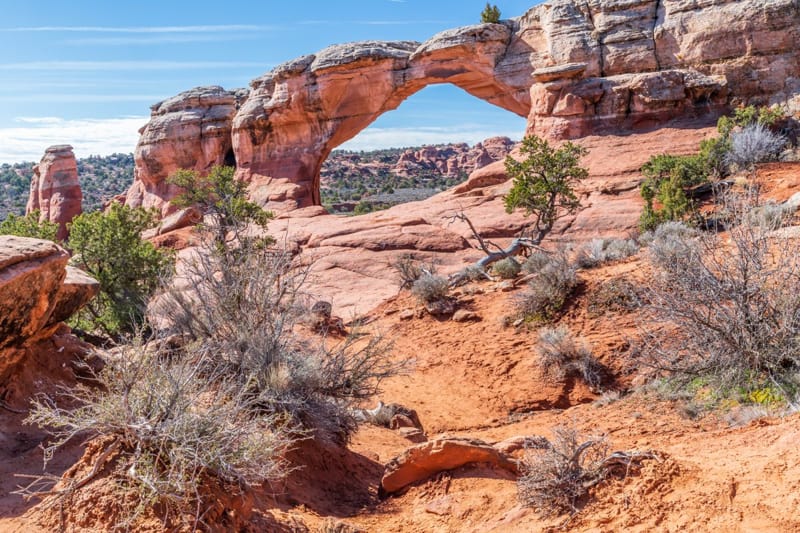
The back side of Broken Arch offers a wonderful view.
BEST TIME TO PHOTOGRAPH: early morning, evening and sunset.
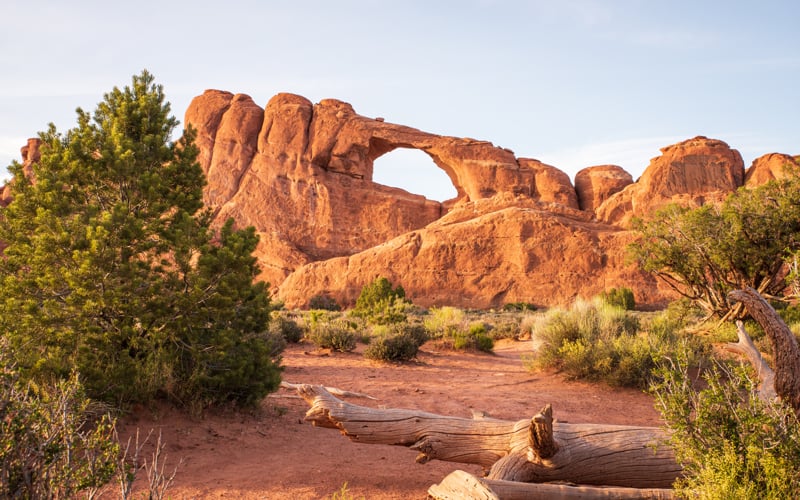
15 – Skyline Arch
Skyline Arch sits high atop rocks in the Devils Garden area and it’s visible from many areas of the park.
Yes, you can take a photo of this arch from the pullout, but you’ll find so many other ways to photograph this arch if you hike along the short trail to get closer to the arch.
BEST TIME TO PHOTOGRAPH: late afternoon and sunset this arch glows with reflected light.
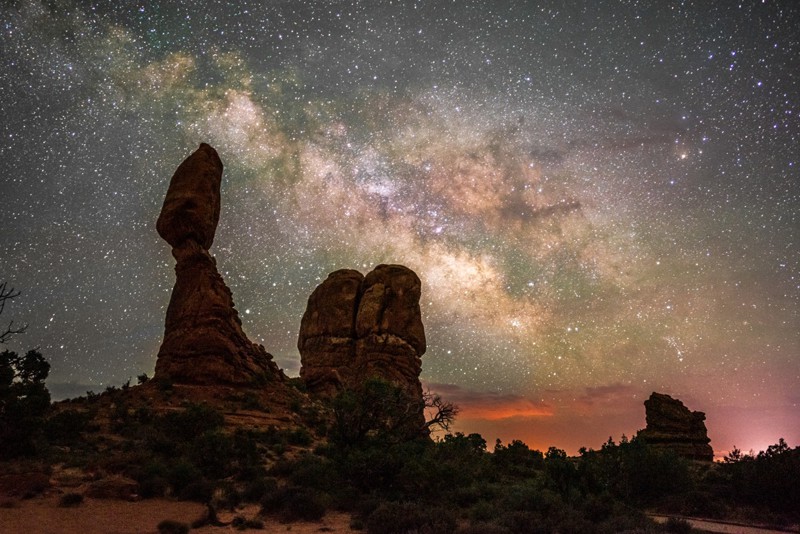
Arches National Park Night Photography
Arches is recognized as an International Dark Sky Park. The park’s accessibility, remote location, altitude and weather are why they say “Half the Park is After Dark”.
Photographers from around the world come to Arches to photograph the Milky Way. Some top night photography spots and vantage points for stargazing at Arches National Park:
- Balanced Rock
- The Windows
- Garden of Eden Viewpoint
- Panorama Point

Where to Stay Near Arches National Park:
There are no hotels in Arches so most people stay in the nearby town of Moab. There are all types of lodging in and near Moab from budget-friendly hotels to higher-prices resorts. You’ll also find vacation rentals, a hostel, campgrounds and RV parks.
- Places to Stay Near Arches National Park
- Hotels Near Arches National Park
- Places to Stay Near Arches National Park with Kids
- Arches National Park Camping
Here are a few of our favorite places to stay near Arches:
- Holiday Inn Express Hotel & Suites Moab – we enjoyed our stay and highly recommend this hotel due to its location close to Arches.
- Purple Sage – our all-time favorite place to stay in Moab – walking distance to shopping, full kitchen, and only 8 units so you don’t feel lost in a large hotel.
- Red Cliffs Lodge – rooms up to 6 people – located 17 miles from Moab, this lodge is known for its beautiful location, winery and actiities like horseback riding, fishing and more!
- Vacation Rentals Near Arches – we really like rentals with a kitchen, washer and dryer and amenities like a swimming pool and hot tub.
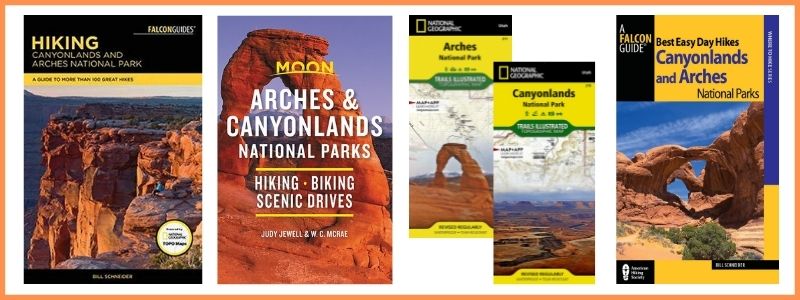
BUY AT AMAZON: Arches and Canyonlands Guides and Maps