Tips to Take Amazing Arches National Park Photos
We’ve asked fellow photographers to share their tips for taking Arches National Park photos!
Use this list of tips and photo spots along with our Arches National Park travel guide to plan your vacation itinerary.
Below you’ll see inspiring pictures of Arches National Park with tips to capture your own images, and the camera gear you’ll need.
Thank you to our photographer friends for sharing their Arches National Park photos and tips with us!

This site contains affiliate links which means WE may receive commissions for purchases made through these links. We only provide links to products we actually use and/or wholeheartedly recommend! As an Amazon Associate, we earn from qualifying purchases. Read the full Disclosure Policy.
Camera Gear for Arches National Park Photography
We have a printed Camera Gear Checklist to help us pack all the equipment we need – that way we don’t forget anything!
- Cameras for Landscape Photography
- Lightweight Travel Tripods
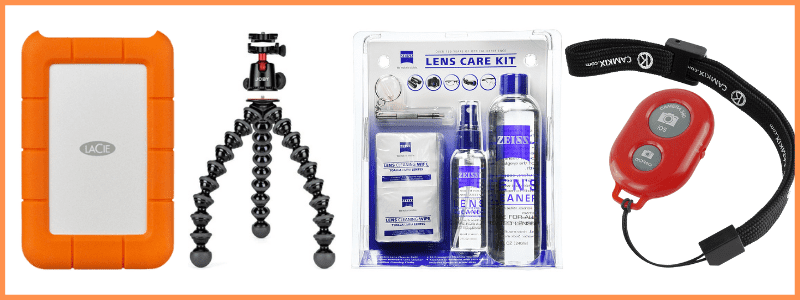
- Camera Backpack: Protecting your camera from the sand and dust in Arches is essential. Using a camera backpack is so nice for hiking too.
- Graduated neutral density filter: There can be extreme differences in light around the various rock structures. To compensate for this variance of light you’ll need to use a GND filter.
- Camera cleaning kit: You’ll want to remove dust that WILL get on your lens – this is NOT for cleaning the sensor.
- Memory cards
- External hard drive: Don’t forget to copy the photos to a portable external hard drive ‘just in case’.
- Headlamp with a red light: For the best sunrise, sunset or night sky shots, you’ll be navigating in the dark. Use a headlamp to light your way from the parking lot to your spot. Wearing a headlamp allows you to set up your equipment without having to hold a flashlight. Remember to use the red light setting and keep the beam pointed on the ground in front of you to avoid disrupting other photographers in the area taking long exposure shots.
Camera Gear at B&H Photo
A Photo Tour of Arches National Park
Take a visual tour through Arches National Park to see the stunning landscapes you’ll see when you visit!
Arches National Park Photo Spots Map
Click to access the Arches National Park photo spots map that shows you all the best places to take pictures!
Tips for Taking Arches National Park Photos
Check out our Arches & Canyonlands Itinerary and Photography Guide with tips and best times to take pictures at each viewpoint!
- Arches National Park photography
- Sunrise at Arches National Park
- Sunset at Arches National Park
- Arches National Park Photo Spots
- Arches National Park Pictures
Below are tips from fellow photographers to capture amazing Arches National Park images!
Angles and Perspectives
Daniel Garcia: Plan your day and Arches National Park Photography around sunset and or sunrise. Pack your headlamps for early morning and late evening photography.
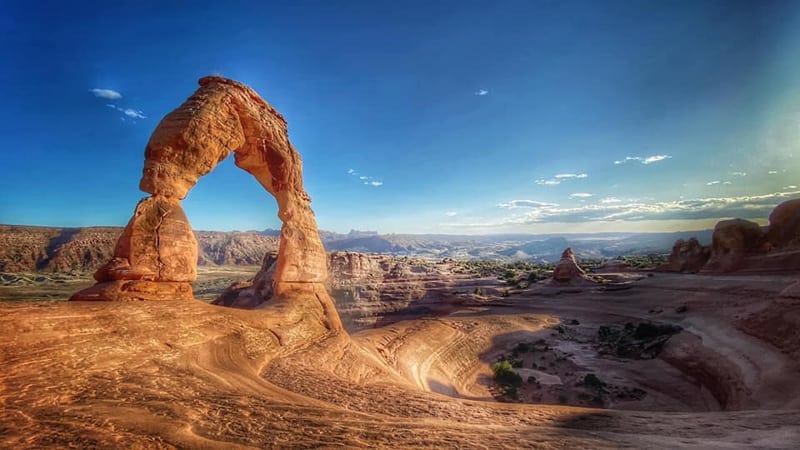
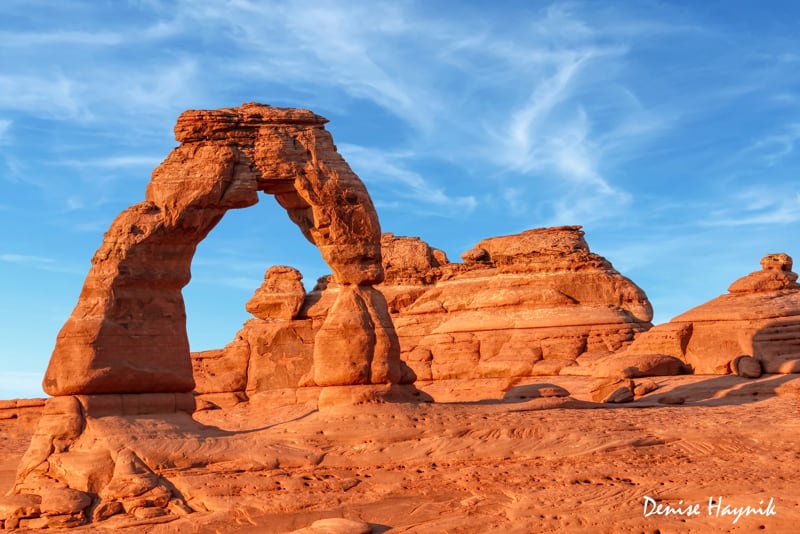
Walk around to find interesting angles and perspectives. Including the bowl you see at Delicate Arch adds interest for the viewer.
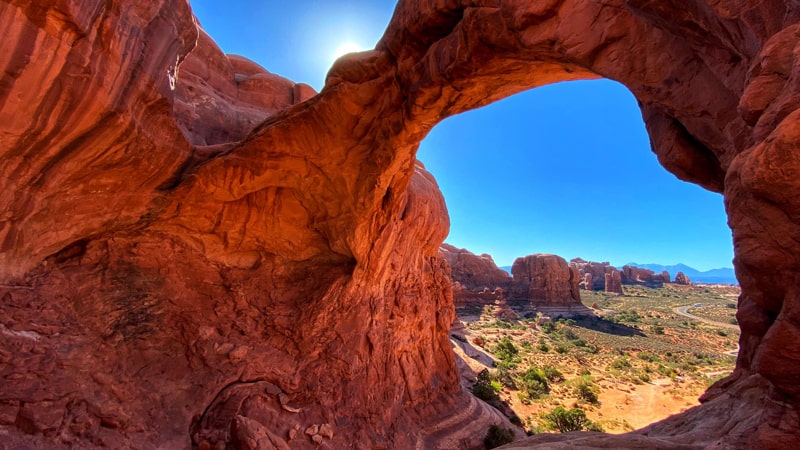
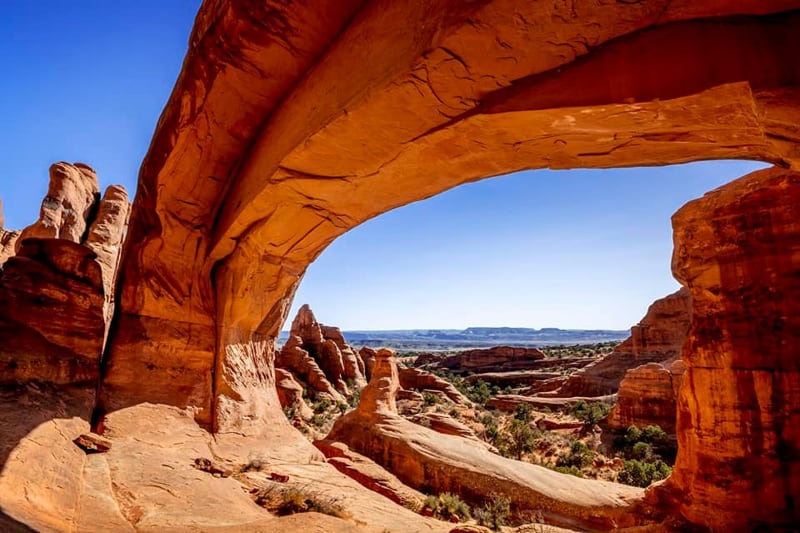
Use the arches in the park to frame the scene like you see in this photo taken at Double Arch.
Delicate Arch Hike
Kevin Hehl: For the Delicate Arch hike for sunset at Arches National Park, if it’s cool at all, take layers, because it will get a lot colder as the sun sets. For the hike back in the dark, make sure you have a good flashlight or headlamp because small cell phone lights won’t cut it!

Walk around to find different ways to photograph Delicate Arch like this view looking up! Or using the arch to create a sunburst as it’s setting.
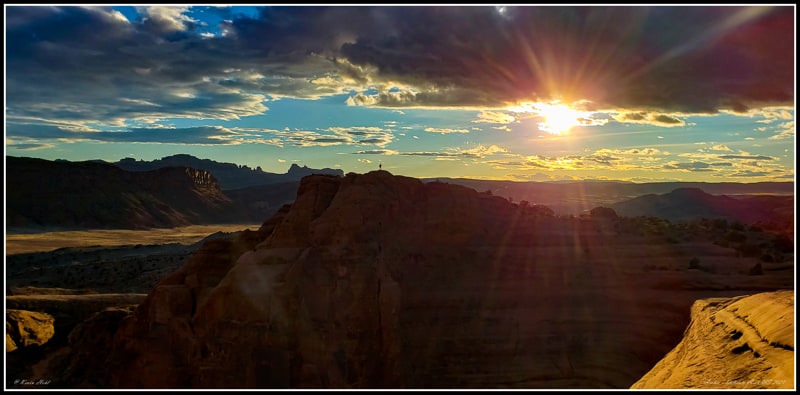
Look for other things in the area to photograph. Can you see the silhouette of the person atop the hill?
Get Off The Beaten Path
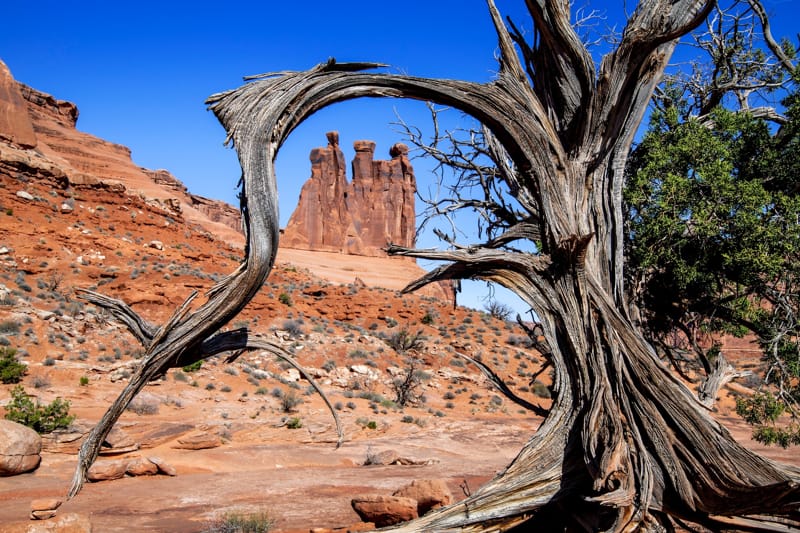
Roy Goldsberry: Arches National Park is big. There are lots of areas to visit so allow a few days. My big tip would be to move around a lot to find better compositions.
You can see the Three Gossips from many viewpoints along the Arches National Park scenic drive.
I found an awesome tree to frame this structure to create a unique image.
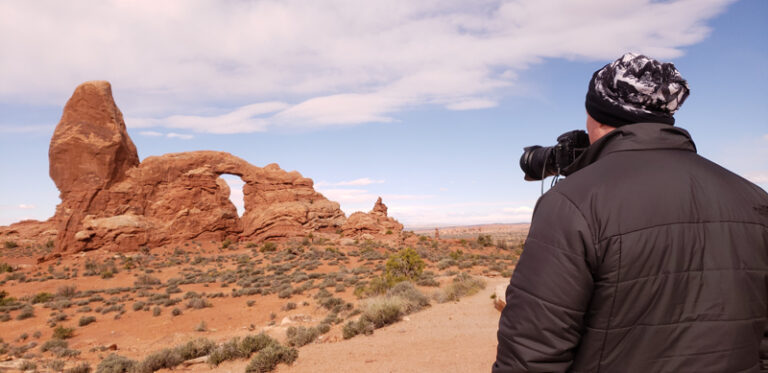
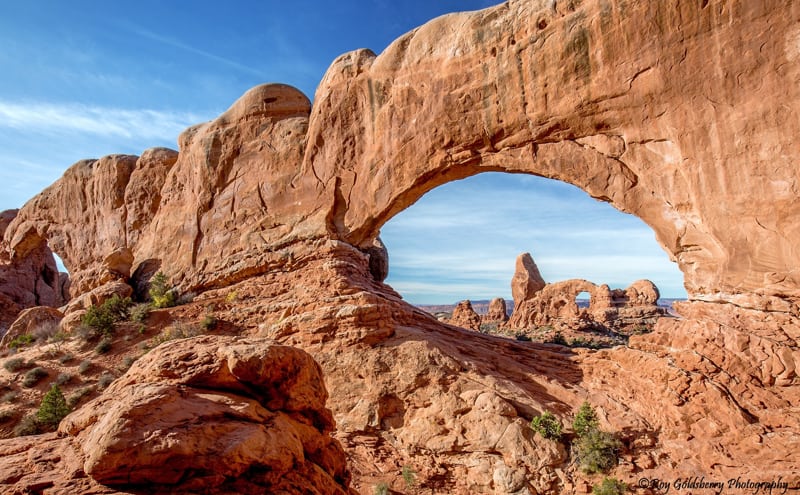
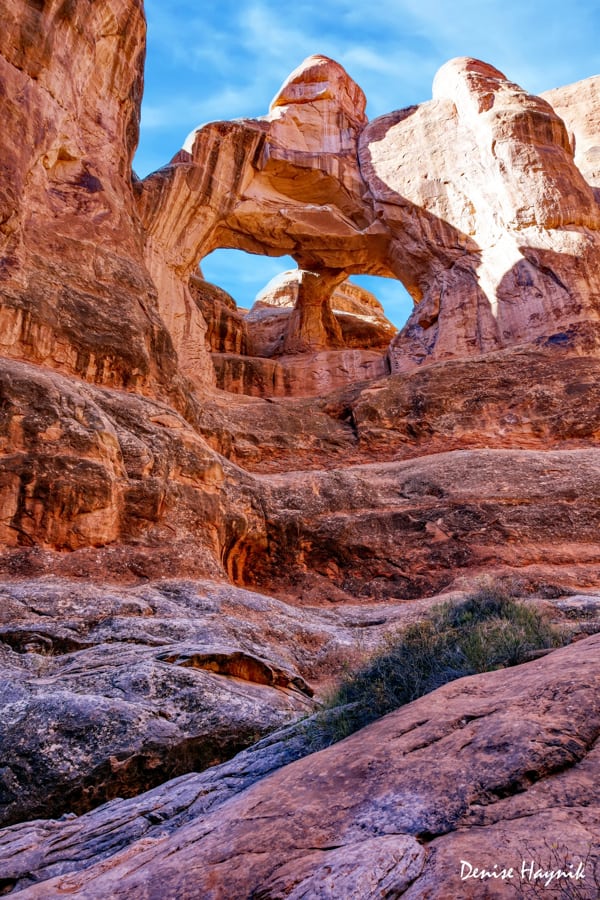
Some areas are remote and require hiking and/or a jeep. Getting this shot of Turret Arch through the North Window requires scrambling over rocks.
And taking a photo of Tower Arch requires hiking 5 miles round trip or driving a 4WD road.
Joe Morris: This view of Balanced Rock is due to the advice given in the Your Photography Journey group to look for different angles.
I took several photos with different perspectives during my 2 days in the park.
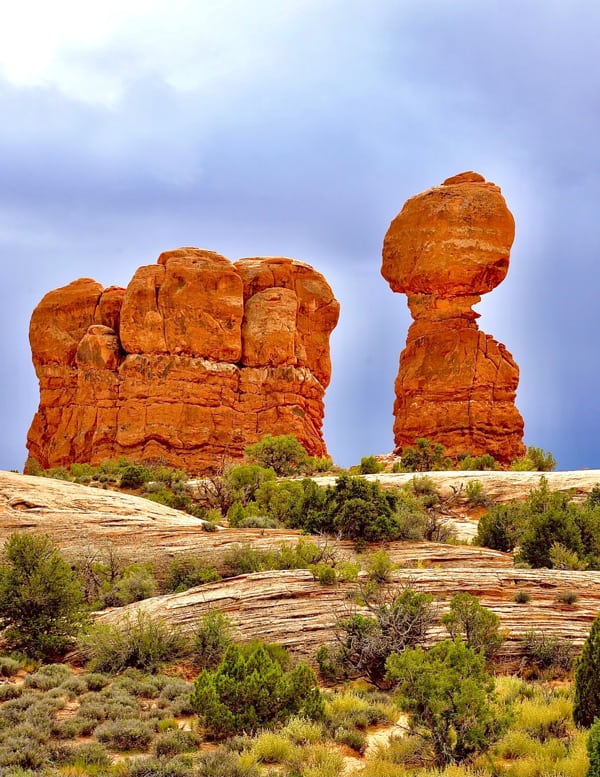
While other angles were interesting, this one was my favorite.
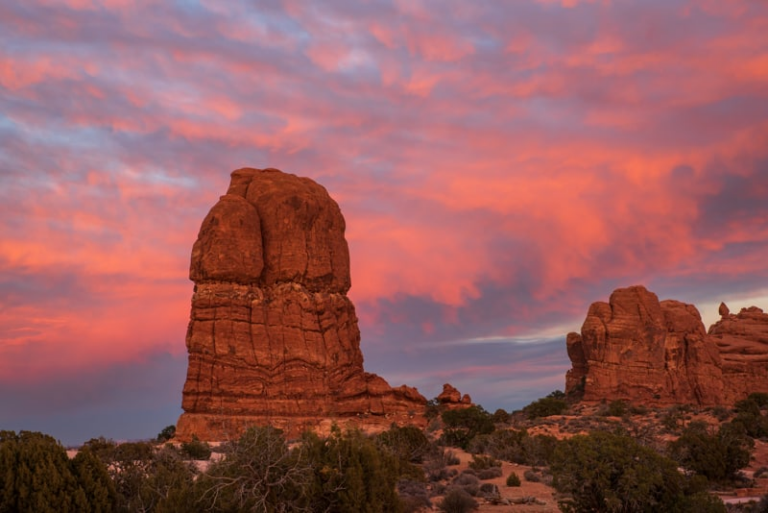
During my trip it was overcast. The clouds were moving and allowing the light to almost spotlight different areas. I drove around the corner and the golden light you’ll see at sunset at Arches National Park made the Fiery Furnace jump out.
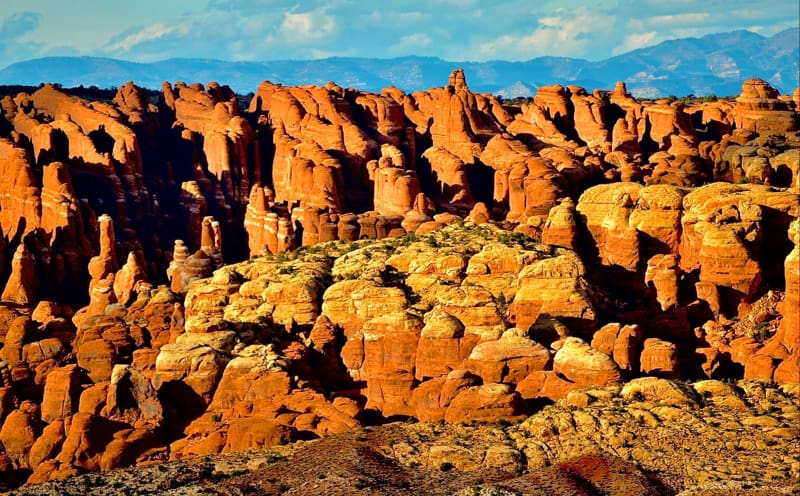
While I am pleased with the image, it doesn’t come close to capturing the vibrancy I saw. Using zoom lenses helped me to compose the photos I wanted to take.
Bracketing
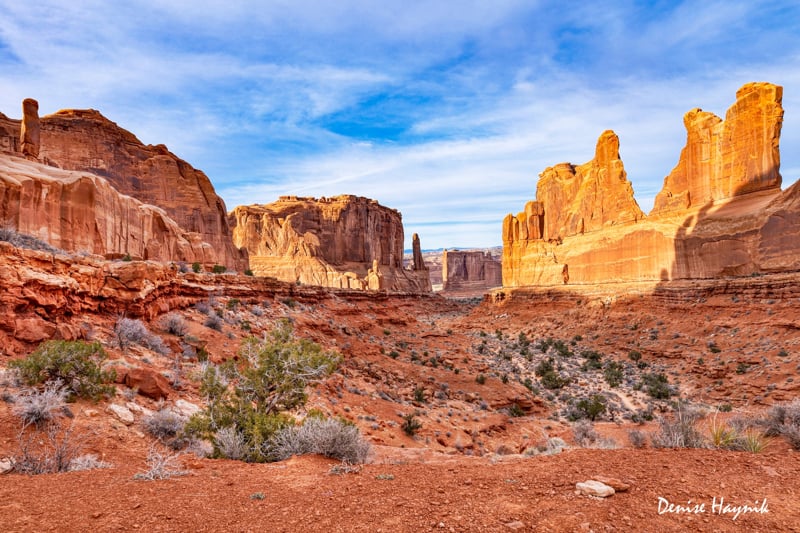
Denise Haynik: As you see in this photo taken at Park Avenue, I take bracketed shots and then use the Aurora HDR software to merge them. I finish up with Photoshop Elements.
For the Delicate Arch Viewpoint, I went a little off trail and used a telephoto lens. It’s a great spot to photograph the red glow on the rocks at sunset at Arches National Park.
Getting a photo of Skull Arch requires hiking in the Fiery Furnace!
I did purchase the Arches & Canyonlands Itinerary and Photography Guide which I found very helpful for this trip!
Camera Settings
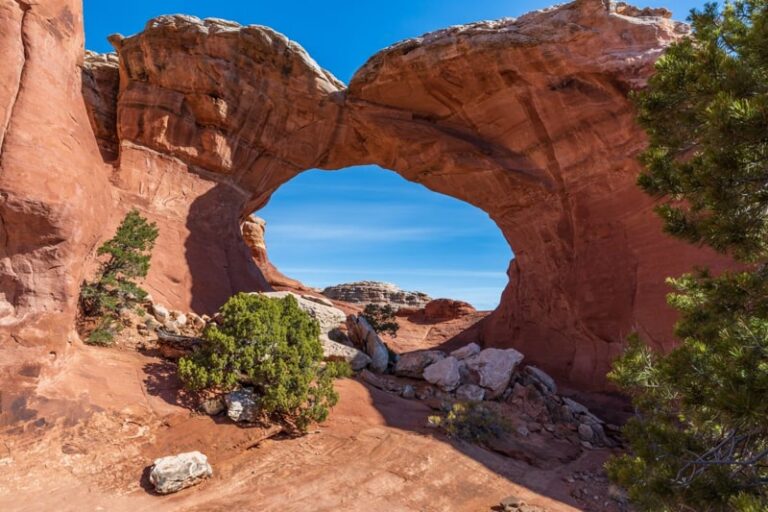
Denise Thomason: This image of Turret Arch was captured with my LG V40 Smartphone. Since the smartphone has higher aperture capabilities, it’s able to capture more light and detail.
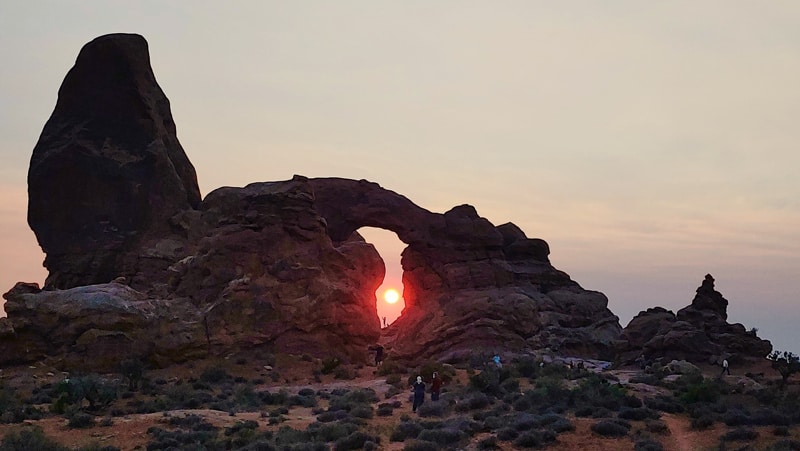
The technique I use, though, isn’t that much different than using a DSLR. I believe I metered for the sky on this one. I wanted to make sure the sun wasn’t blown out, but also wanted to still have some detail in the arch and foreground. Smartphones do pretty good in low-light, but there’s still a possibility of increased noise. I edit smartphone images using Snapseed.
Settings: LG V40, f1.5, ISO 50, 1/1351 sec.
This image was shot handheld using my Canon 60D camera. Not ideal, but I had been walking around waiting for sunset and then saw the sun going down through the arch. Had to get the shots, so…
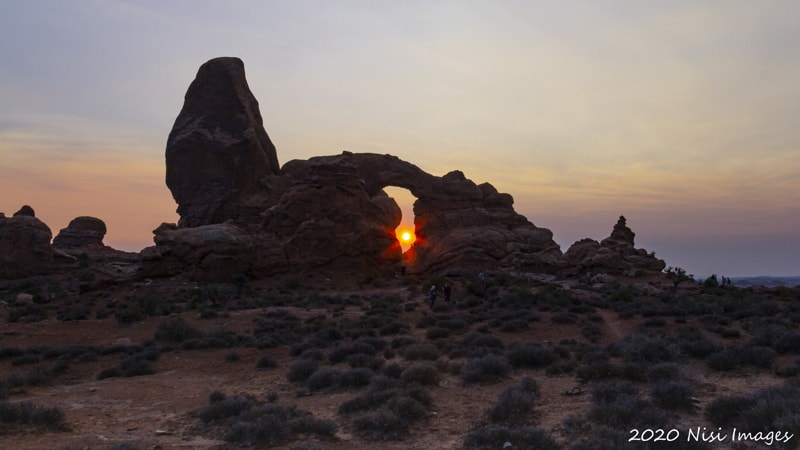
To get this shot, the two most important things was to be as steady as possible (since I wasn’t using a tripod), and to find the best place to meter in order to get the setting sun at the right exposure. I shot many images as the sun set. My goal was to try and get it fully within the arch and to not have it blow out. I used the sky off to the right of the arch, and the ground between me and the arch to try and get the right exposure. I didn’t want the arch to be completely dark in silhouette, so I was also trying to make exposure adjustments in camera to maintain some detail in the foreground. Even if it was a little dark, I wanted to be able to pull out some details of the foreground in post using Lightroom.
Settings: Canon 60D, 18-135mm lens, F13, ISO400, 1/60sec.
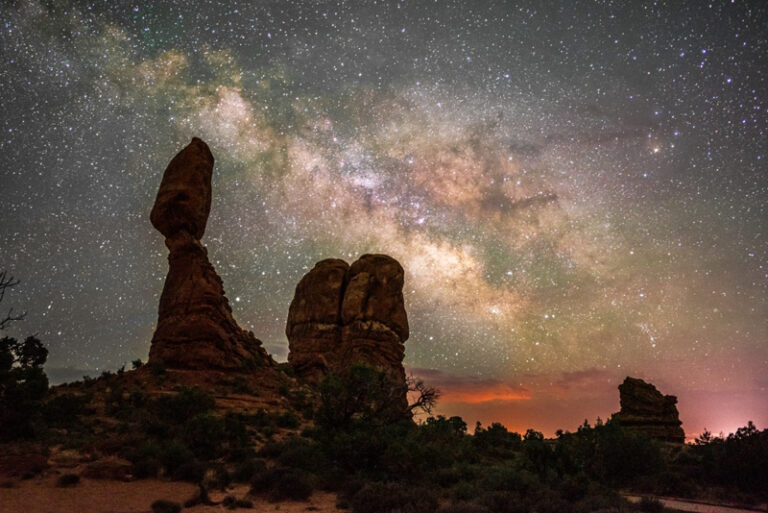
The sky wasn’t cooperating very well this night, and this was the best image of the milky way by Turret Arch that came out of that night. There was a lot of haze in the sky, which amplified the nearby city lights. But, I liked the silhouette of the rocks and arch and was able to bring out some good color in post processing.
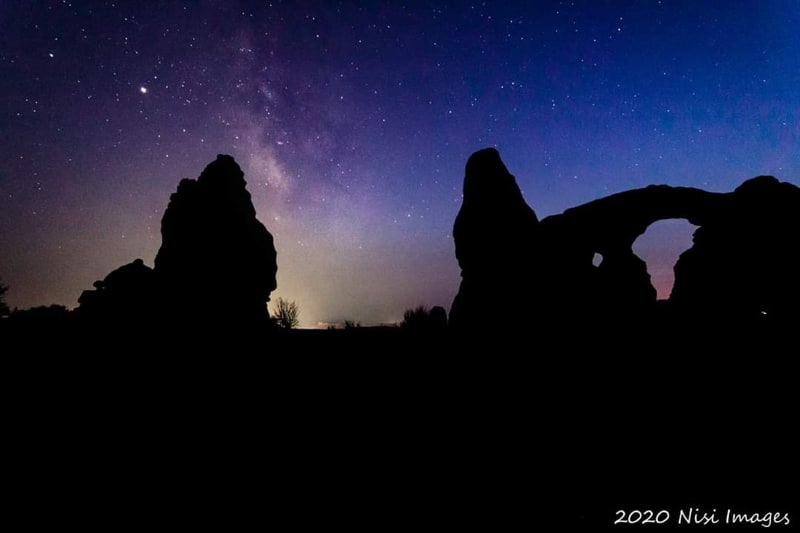
As much as I’d like to say I follow all the mathematic timing settings, I use them as a guideline. I’m shooting crop sensor, and I try to shoot on the lower ISO’s to minimize noise. Of course, anytime you’re doing night photography, a tripod is a must, as well as a remote shutter release. The lens I use for astrophotography is a 10mm, 2.8 manual lens – so there’s no auto focus, which is ok since it’s hard to use autofocus at night. As mentioned, my camera is a crop sensor, so the 35mm equivalent is approximately 16mm. This image was post processed in Lightroom and Photoshop.
Settings: Canon 60D, 10mm lens, f2.8, ISO 3200, 15 sec.
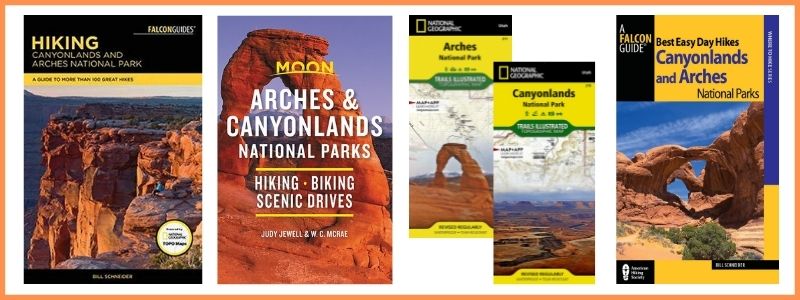
BUY AT AMAZON: Arches and Canyonlands Guides and Maps
Planning an Arches National Park Vacation:
- Best Time to Visit Arches National Park
- Things to Do at Arches National Park
- Arches National Park Packing List
- Arches National Park with Kids
- Arches National Park Photography
- Arches National Park Tours
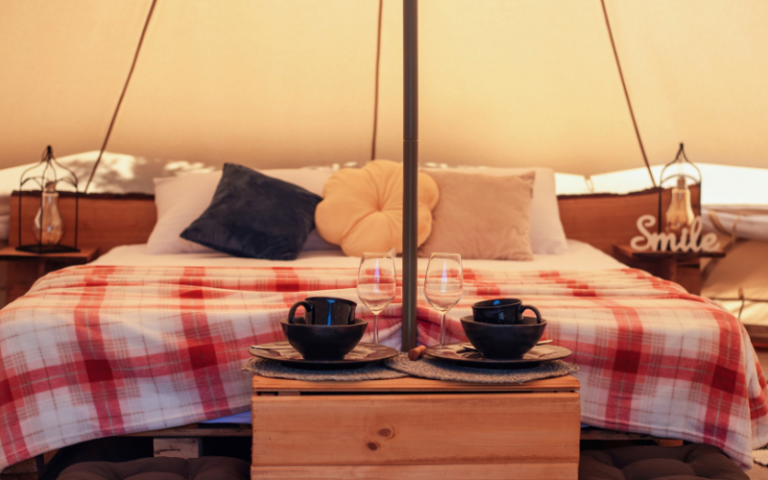
Where to Stay Near Arches National Park:
There are no hotels in Arches so most people stay in the nearby town of Moab. There are all types of lodging in and near Moab from budget-friendly hotels to higher-prices resorts. You’ll also find vacation rentals, a hostel, campgrounds and RV parks.
- Places to Stay Near Arches National Park
- Hotels Near Arches National Park
- Places to Stay Near Arches National Park with Kids
- Arches National Park Camping
Here are a few of our favorite places to stay near Arches:
- Holiday Inn Express Hotel & Suites Moab – we enjoyed our stay and highly recommend this hotel due to its location close to Arches.
- Purple Sage – our all-time favorite place to stay in Moab – walking distance to shopping, full kitchen, and only 8 units so you don’t feel lost in a large hotel.
- Red Cliffs Lodge – rooms up to 6 people – located 17 miles from Moab, this lodge is known for its beautiful location, winery and actiities like horseback riding, fishing and more!
- Vacation Rentals Near Arches – we really like rentals with a kitchen, washer and dryer and amenities like a swimming pool and hot tub.